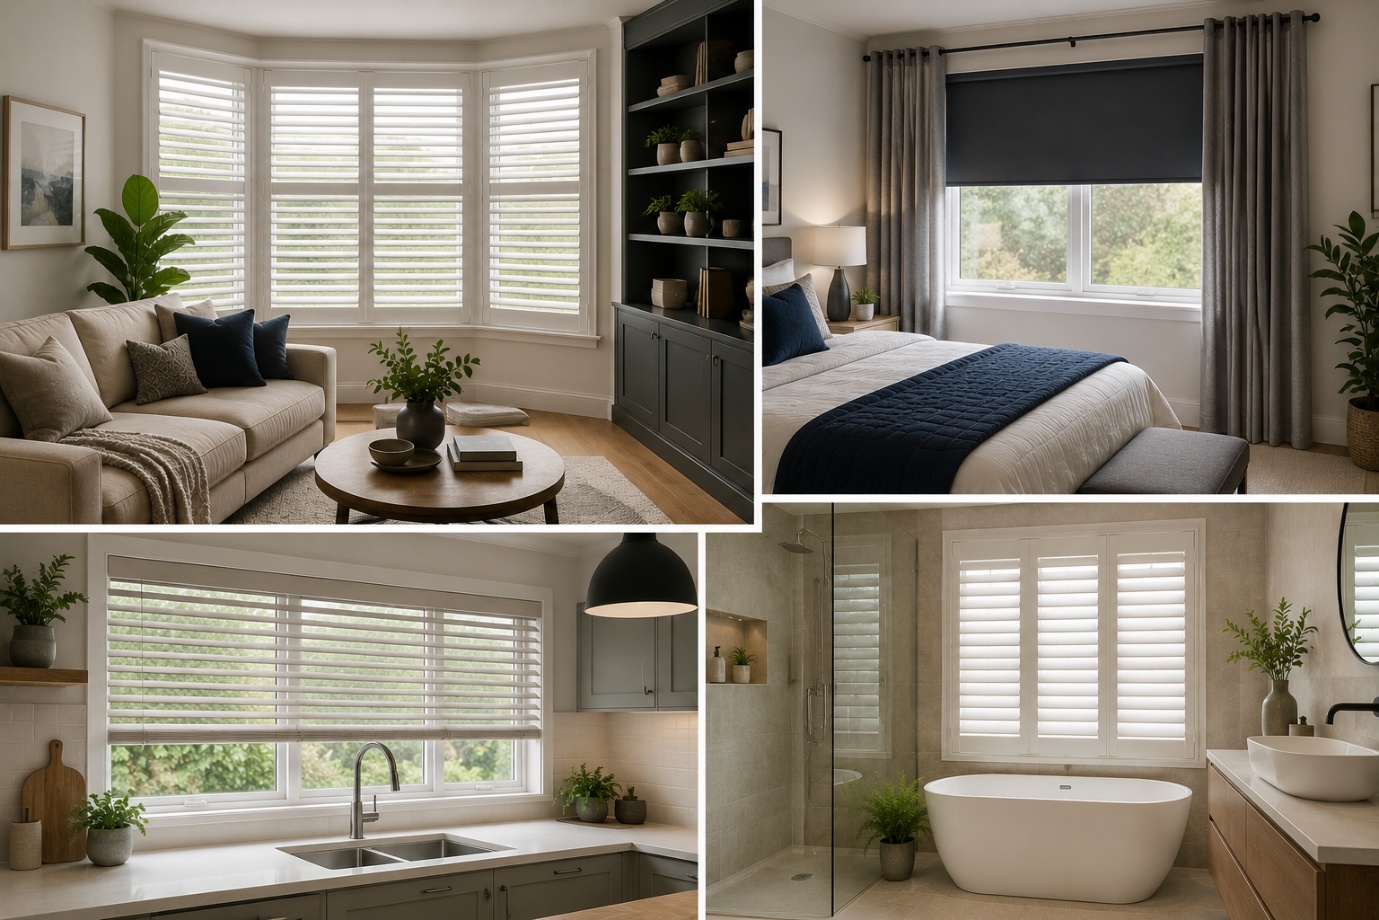
How to Choose the Perfect Window Coverings for Your Home
Window coverings are more than just decorative features. They influence

If you've ever painted a piece of furniture and watched it chip within a month, you already know why picking the right kitchen cabinet paint matters so much. Cabinets take a beating every single day. They get grabbed with greasy hands, bumped by dish towels, and splashed with hot water more times than any wall ever will.
That's the real difference between wall paint and cabinet paint. Wall paint is made to look nice and survive the occasional wipe-down. Cabinet paint has to survive daily contact, moisture, and constant opening and closing without cracking, peeling, or turning yellow.
Choosing the wrong product is the number one reason DIY cabinet makeovers fail. People use leftover wall paint, skip primer, or rush the drying time — and within a few weeks they're left with sticky, chipped, or foggy-looking cabinets.
In this guide, you'll learn which paint types actually hold up, which finishes look best and clean the easiest, how to match paint to your cabinet material, and how to apply it like a pro so your kitchen cabinet paint job lasts for years instead of months.
Quick Answer: Kitchen cabinet paint is a durable coating made to handle daily contact, moisture, and cleaning better than regular wall paint. For most kitchens, a hybrid enamel — like Benjamin Moore Advance — offers the best balance of durability and ease of use, applied in a satin or semi-gloss finish for easy cleaning without excess shine. No matter which paint you choose, proper preparation (cleaning, deglossing, sanding, and priming) matters more for long-term durability than the price of the paint itself.
Kitchen cabinet paint is a specialized coating built to handle the specific stress that kitchen cabinets go through every day. It's not just "fancier" wall paint — it's formulated differently at a chemical level so it bonds harder and stays flexible under repeated use.
Regular wall paint is designed for large, mostly untouched vertical surfaces. Cabinet paint is designed for small, high-contact surfaces that get touched, wiped, and bumped constantly. That's why using the same paint for both usually ends in disappointment.
Here's what good cabinet paint needs to do that wall paint doesn't:
Durability. Cabinets get opened and closed hundreds of times a month. The paint needs to flex without cracking at the edges and corners.
Moisture resistance. Kitchens produce steam, splashes, and humidity from cooking and dishwashing. Paint that isn't moisture-resistant will bubble or peel near the sink and stove.
Heat resistance. Cabinets near the oven or stovetop face repeated temperature swings. Cheap paint can soften, discolor, or become tacky from heat exposure.
Cleaning resistance. Cabinets need to survive being scrubbed to remove grease and fingerprints. A wall-paint finish will dull or wear thin after repeated cleaning.
Strong adhesion. Cabinets are often made of wood, MDF, or laminate — surfaces that don't hold paint as easily as drywall. Cabinet paint is formulated to grip these surfaces tightly.
A smooth, hard finish. Because cabinets are viewed up close, brush marks and texture are far more noticeable than they would be on a wall.
| Wall Paint | Cabinet Paint |
| Designed for large, low-contact surfaces | Designed for small, high-contact surfaces |
| Softer finish, prone to scuffing | Hard, durable finish that resists scuffs |
| Limited moisture resistance | Built to resist steam and splashes |
| Dries flat, may show brush strokes | Self-levels for a smoother look |
| Not made for constant scrubbing | Withstands frequent cleaning |
| Lower cost | Higher cost, but longer-lasting |
Picking the right paint for kitchen cabinets comes down to three decisions: the paint type, the finish, and how well it matches your cabinet material. Get these three right, and everything else — color, brand, technique — becomes much easier.
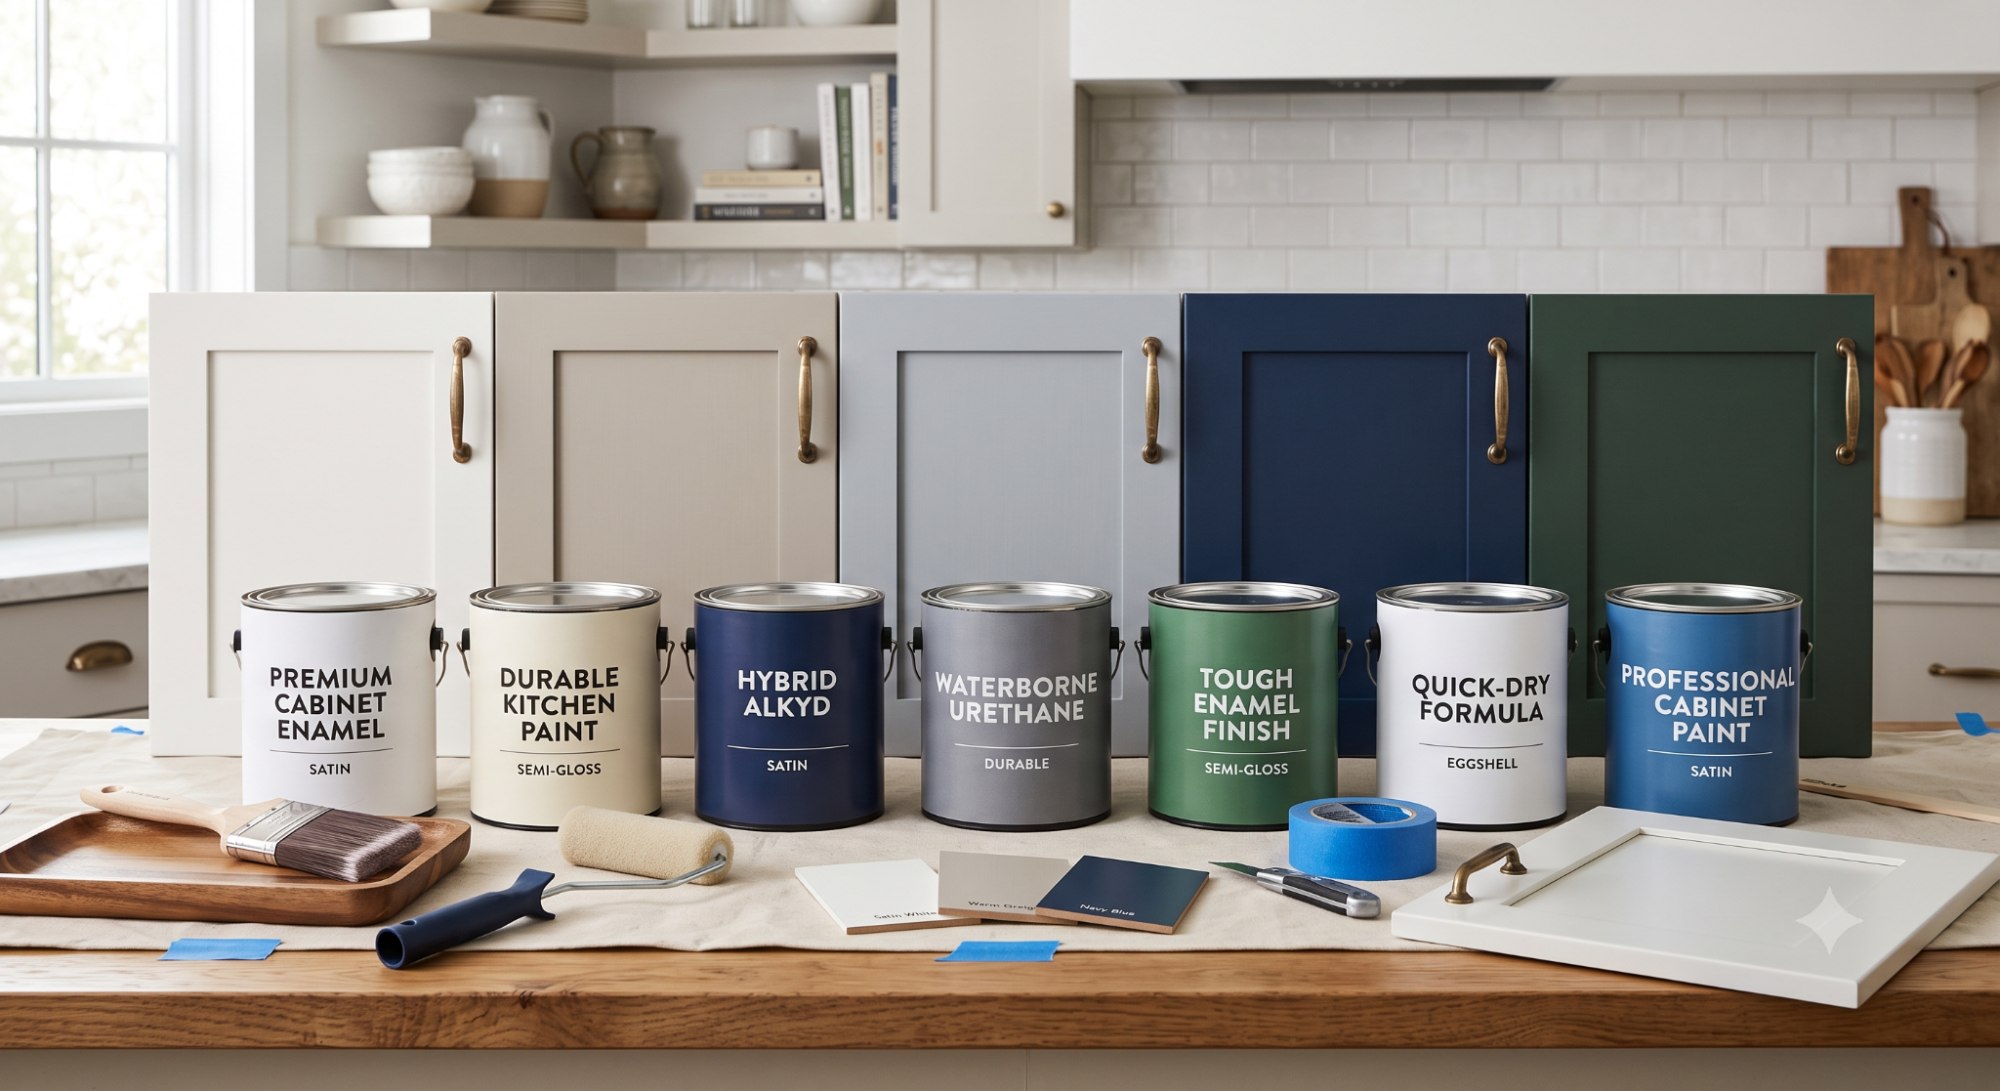
There are four main types of paint used on kitchen cabinets today, and each one behaves differently once it's on your cabinets.
Acrylic latex paint is water-based and easy to work with. It dries fast, cleans up with soap and water, and has gotten much more durable in recent years. It's a solid choice for most home kitchens, especially if you're painting yourself for the first time.
Alkyd enamel is an oil-modified paint that dries to a harder, smoother finish than acrylic latex. It self-levels well, which means fewer visible brush marks. The tradeoff is a longer drying and curing time, plus a stronger smell during application.
Hybrid enamel paints try to combine the best of both worlds — the easy cleanup of acrylic with the hardness and smoothness of alkyd. Many of today's top cabinet paints, including a few we'll cover below, fall into this hybrid category.
Oil-based paint used to be the go-to for cabinets because of its durability. It's less common now due to stricter VOC (fume) regulations in many areas, longer drying times, and the hassle of using mineral spirits for cleanup. It still shows up occasionally, but most professionals have shifted to hybrid enamels instead.
| Paint Type | Dry Time | Durability | Ease of Use | Smell/VOCs |
| Acrylic Latex | Fast | Good | Easy | Low |
| Alkyd Enamel | Slow | Excellent | Moderate | Moderate |
| Hybrid Enamel | Moderate | Excellent | Moderate | Low–Moderate |
| Oil-Based | Slow | Excellent | Difficult | High |
Pro Tip: If you're painting cabinets for the first time, a hybrid enamel gives you the most forgiving balance of durability and ease of use.
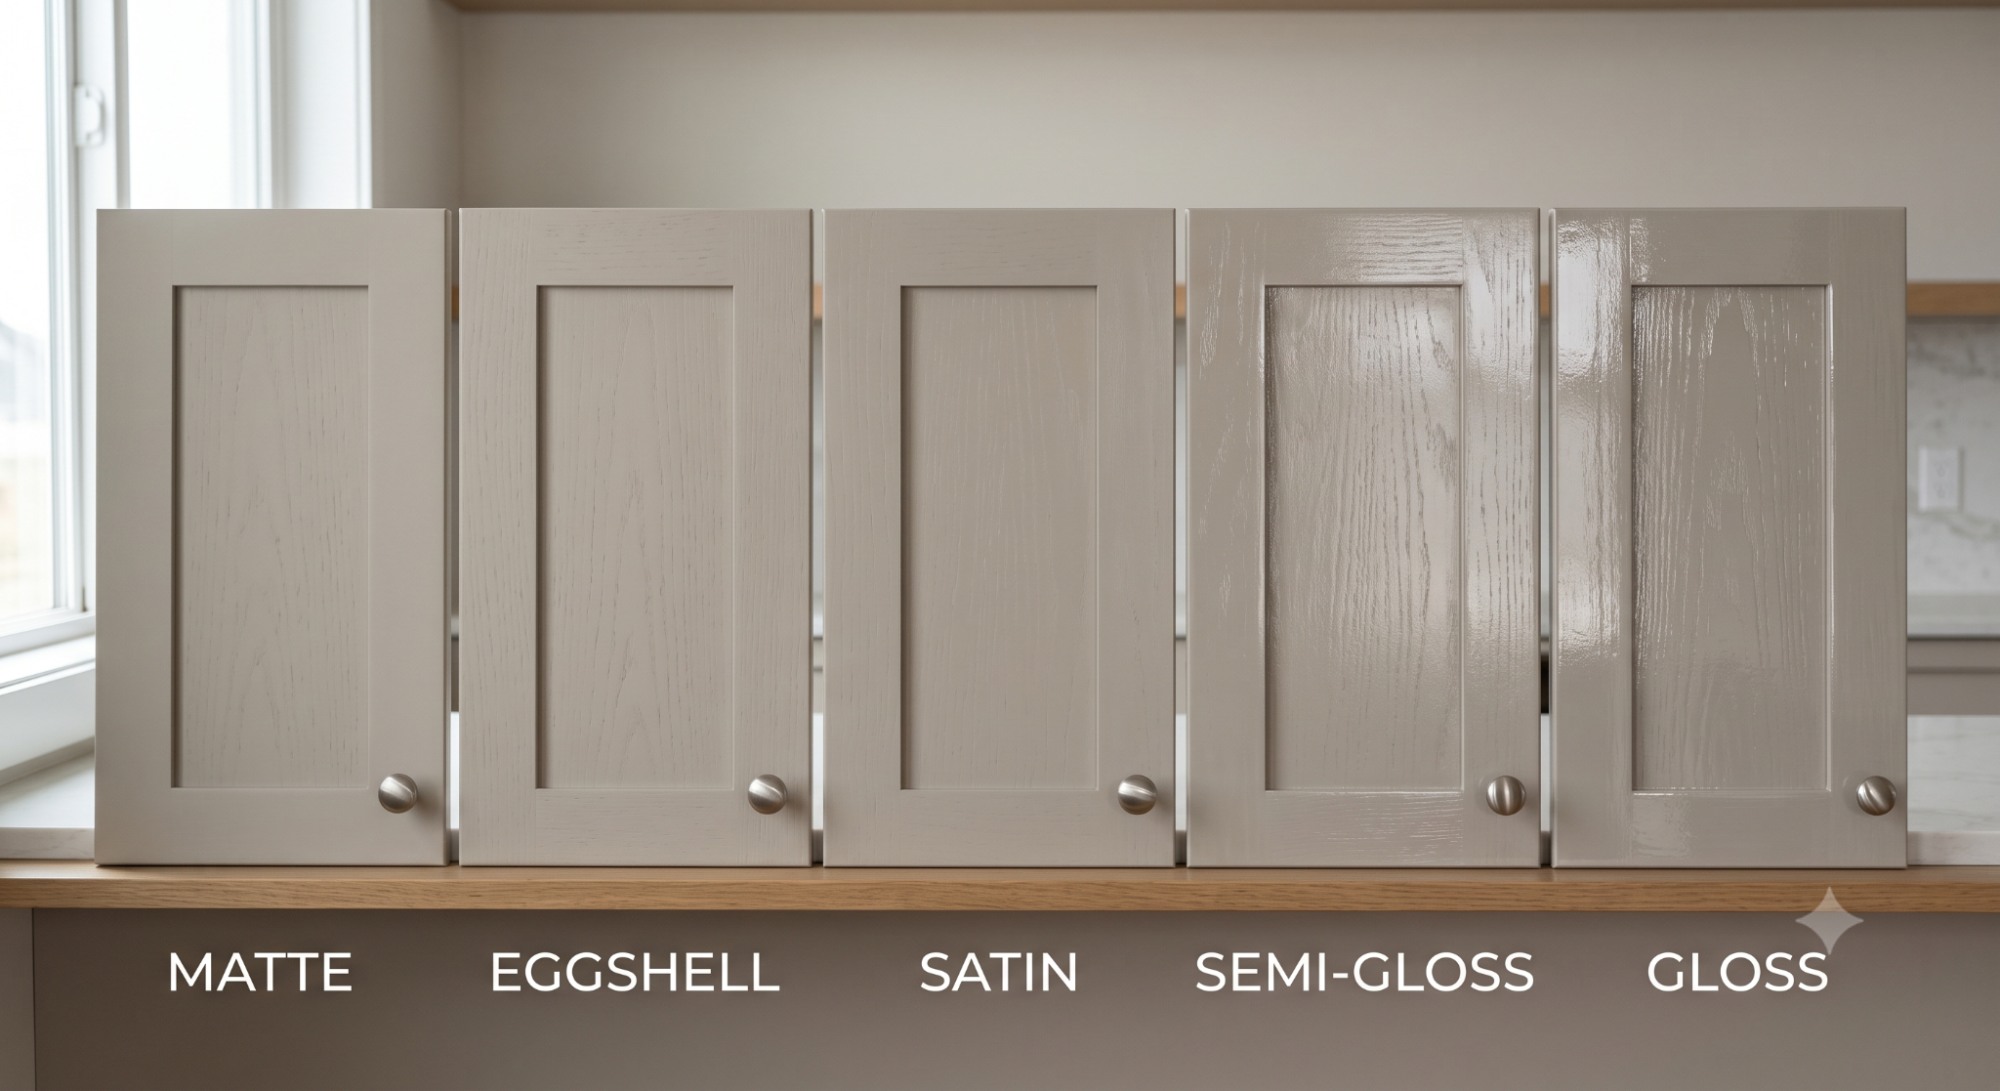
The finish you choose affects both how your cabinets look and how easy they are to keep clean. In general, the shinier the finish, the more durable and washable it is — but shine also shows fingerprints and surface imperfections more easily.
Most professional cabinet painters lean toward satin or semi-gloss because they strike the best balance between durability, cleanability, and forgiving imperfections in the surface underneath.
Not all cabinet materials accept paint the same way. Knowing what you're working with helps you choose the right primer and avoid adhesion problems down the road.
Before you head to the paint store, run through this checklist so you buy the right product the first time:
✔ Cabinet material (wood, MDF, or laminate)
✔ Existing finish (raw wood, previously painted, or stained)
✔ Desired sheen (satin, semi-gloss, or gloss)
✔ Application method (brush, roller, or sprayer)
✔ Kitchen traffic level (light use vs. busy family kitchen)
✔ Drying time available (a few days vs. several weeks)
✔ Budget (per gallon and how many gallons your project needs)
There's no single "best" cabinet paint for every situation, but some products consistently perform better than others based on real-world use. Here's a quick comparison before we dig into each one.
| Paint | Best For | Finish | Pros | Cons |
| Benjamin Moore Advance | All-around cabinet projects | Satin, Semi-gloss | Smooth self-leveling finish, strong durability | Long cure time |
| Sherwin-Williams Emerald Urethane | High-traffic kitchens | Satin, Semi-gloss, Gloss | Excellent hardness, resists chipping | Higher price |
| INSL-X Cabinet Coat | DIY brush-and-roll projects | Satin, Semi-gloss | Great leveling for brush application | Slower dry time between coats |
| Behr Alkyd Enamel | Budget-conscious DIYers | Satin, Semi-gloss | Widely available, affordable | Stronger odor during application |
| Rust-Oleum Cabinet Transformations | Quick no-sand refreshes | Various | No heavy sanding required | Less durable long-term than enamel systems |
| PPG Break-Through | Sprayed professional finishes | Satin, Semi-gloss, Gloss | Fast dry time, low odor | Best results need spray equipment |
| Valspar Cabinet & Furniture Paint | Simple one-can projects | Satin | Easy application, decent durability | Less impact resistance than premium options |
| Category | Winner |
| Best Overall | Benjamin Moore Advance |
| Best Budget | Behr Alkyd Enamel |
| Best Premium | Sherwin-Williams Emerald Urethane |
| Best for DIY | INSL-X Cabinet Coat |
| Best for Professional Finish | PPG Break-Through |
| Best No-Sand Option | Rust-Oleum Cabinet Transformations |
Benjamin Moore Advance is a hybrid alkyd paint that's become a favorite among professional cabinet painters. It self-levels nicely, which means brush marks smooth out as it dries, giving you a factory-like finish without a sprayer.
Drying time: Touch-dry in a few hours, but it needs a full 30 days to cure to its maximum hardness.
Durability: Excellent once fully cured. It resists chipping, staining, and yellowing better than most acrylic paints.
Best use cases: Full cabinet repaints where you want a smooth, professional-looking finish and are willing to wait out the longer cure time.
Downsides: The long cure window means you need to handle cabinets gently for weeks after painting, which can be inconvenient for a busy kitchen.
Best For: Homeowners repainting a full kitchen who want a smooth, near-factory finish and don't mind waiting out the cure time. Works well on wood, MDF, and previously painted cabinets, and can be applied by brush, roller, or sprayer.
Not Ideal If: You need cabinets back in daily use within a few days — in that case, a faster-curing acrylic paint would be a better fit.
This is a top-tier option built specifically for surfaces that need serious durability, like cabinets, trim, and doors. The added urethane makes the dried finish notably hard and resistant to scuffing.
Drying time: Dries to the touch fairly quickly, with a full cure taking a few weeks.
Durability: Among the most chip-resistant options on this list, which makes it a strong pick for busy family kitchens.
Best use cases: Kitchens with kids, pets, or heavy daily cabinet use where long-term toughness matters more than upfront cost.
Downsides: It's priced at a premium, and it performs best when sprayed rather than brushed.
Best For: Busy family kitchens with kids or pets, or anyone using an HVLP sprayer who wants maximum chip resistance on any cabinet material.
Not Ideal If: You're on a tight budget or only have a brush and roller on hand — the price and spray-friendly formula are best justified by heavy daily use.
INSL-X Cabinet Coat was designed specifically with cabinets in mind, and it shows. It's known for laying down smoothly with a brush or roller, which makes it popular with DIYers who don't have spray equipment.
Drying time: Dries to the touch in a few hours, but allow more time between coats than you might expect.
Durability: Solid overall durability, especially for a brush-friendly paint, though not quite as hard as the premium urethane options.
Best use cases: DIYers who want a professional-looking result using just a brush and foam roller.
Downsides: Patience is required — rushing the recoat time can lead to a softer finish that dents or scuffs more easily.
Best For: DIYers without spray equipment who want a smooth, brush-and-roller finish on wood, MDF, or laminate cabinets.
Not Ideal If: You're working on a tight timeline — the longer recoat window makes this a slower project than some competitors.
Behr's alkyd enamel is an accessible option available at most home improvement stores, making it convenient for DIYers who want to start a project without ordering online or visiting a specialty paint store.
Drying time: Dries within a few hours, with a longer full cure period typical of alkyd formulas.
Durability: Good durability for the price point, especially in lower-traffic kitchens.
Best use cases: Budget-friendly full cabinet repaints where convenience and cost matter more than top-tier hardness.
Downsides: The oil-modified formula has a noticeable smell during application, so ventilation is important.
Best For: Budget-conscious DIYers tackling a full kitchen who want a product available locally at most hardware stores.
Not Ideal If: You're sensitive to strong odors or lack good ventilation — the smell can linger longer than water-based alternatives.
This is a full kit system rather than a single can of paint, designed to skip heavy sanding by using a bonding deglosser instead. It's marketed toward people who want a faster weekend project.
Drying time: Fast — this system is built around speed.
Durability: Decent for lighter use, but it typically doesn't hold up as long-term as a full enamel repaint under heavy daily wear.
Best use cases: Renters, quick refreshes, or anyone testing out a color change before committing to a full repaint.
Downsides: Because it skips traditional sanding and priming steps, it generally has a shorter lifespan before touch-ups are needed.
Best For: Renters, quick weekend refreshes, or anyone wanting to test a new color before committing to a full traditional repaint.
Not Ideal If: You want a long-term, heavy-duty finish — a full enamel system with proper sanding and priming will outlast this kit.
PPG Break-Through is a waterborne alkyd paint popular with professional painters who spray cabinets for a living. It dries fast for an alkyd-style paint while still delivering a hard, smooth finish.
Drying time: Fast to the touch, which helps professionals move quickly between coats.
Durability: Strong, especially once cured, and known for holding color well over time.
Best use cases: Anyone using an HVLP paint sprayer who wants a smooth, professional-grade finish without long wait times between coats.
Downsides: Brush application is possible but doesn't showcase this paint's strengths the way spraying does.
Best For: Professionals or serious DIYers with an HVLP sprayer who want a fast-drying, professional-grade finish on any cabinet material.
Not Ideal If: You only plan to brush and roll — this paint's fast dry time works against you without spray equipment, since it can be harder to keep a wet edge.
Valspar's cabinet-specific line is a straightforward, easy-to-find option for smaller projects like a single vanity or a set of furniture rather than an entire kitchen.
Drying time: Reasonable dry time similar to standard acrylic-based cabinet paints.
Durability: Fine for everyday use, though it's not built to the same impact-resistance standard as premium urethane formulas.
Best use cases: Smaller cabinet projects or furniture pieces that don't see heavy daily impact.
Downsides: Less resistant to chipping under hard daily use compared to the premium picks on this list.
Best For: Smaller projects like a bathroom vanity, built-in shelving, or furniture that doesn't face constant daily impact.
Not Ideal If: You're painting a heavily used kitchen — a more impact-resistant urethane or hybrid enamel will hold up better long-term.
For most homeowners watching their budget, Behr Alkyd Enamel offers the best combination of affordability, availability, and reasonable durability. It won't outperform premium urethane paints long-term, but for the price, it holds up well in average-use kitchens.
Sherwin-Williams Emerald Urethane earns the premium spot thanks to its outstanding chip resistance and hardness. It costs more, but in a high-traffic family kitchen, that extra durability often pays for itself by delaying the next repaint.
For most kitchens, Benjamin Moore Advance hits the best overall balance. It self-levels into a smooth, near-factory finish even without a sprayer, resists chipping and yellowing once cured, and is widely available through Benjamin Moore retailers — no need to hunt down specialty spray equipment or order online.
The main compromise is time. Advance needs about 30 days to reach full hardness, so you'll want to handle doors and drawers gently for a few weeks after painting. If your household can't work around that — say, you have young kids constantly grabbing cabinet handles — a faster-curing acrylic latex paint may serve you better, even if it's slightly less durable long-term.
Homeowners who want maximum toughness above all else, especially in a high-traffic family kitchen, should lean toward Sherwin-Williams Emerald Urethane instead, accepting the higher price tag and the fact that it performs best when sprayed. And if budget is the deciding factor, Behr Alkyd Enamel remains a smart, practical choice that most kitchens will never outgrow.
What makes Benjamin Moore Advance the overall winner isn't that it's the cheapest, the fastest, or the toughest — it's that it offers the most balanced combination of finish quality, ease of application, and long-term durability for the widest range of kitchens and skill levels.
Trends come and go, but some kitchen cabinet paint colors have stayed popular for years because they work in almost any kitchen and under almost any lighting. Here are five that consistently hold up over time.
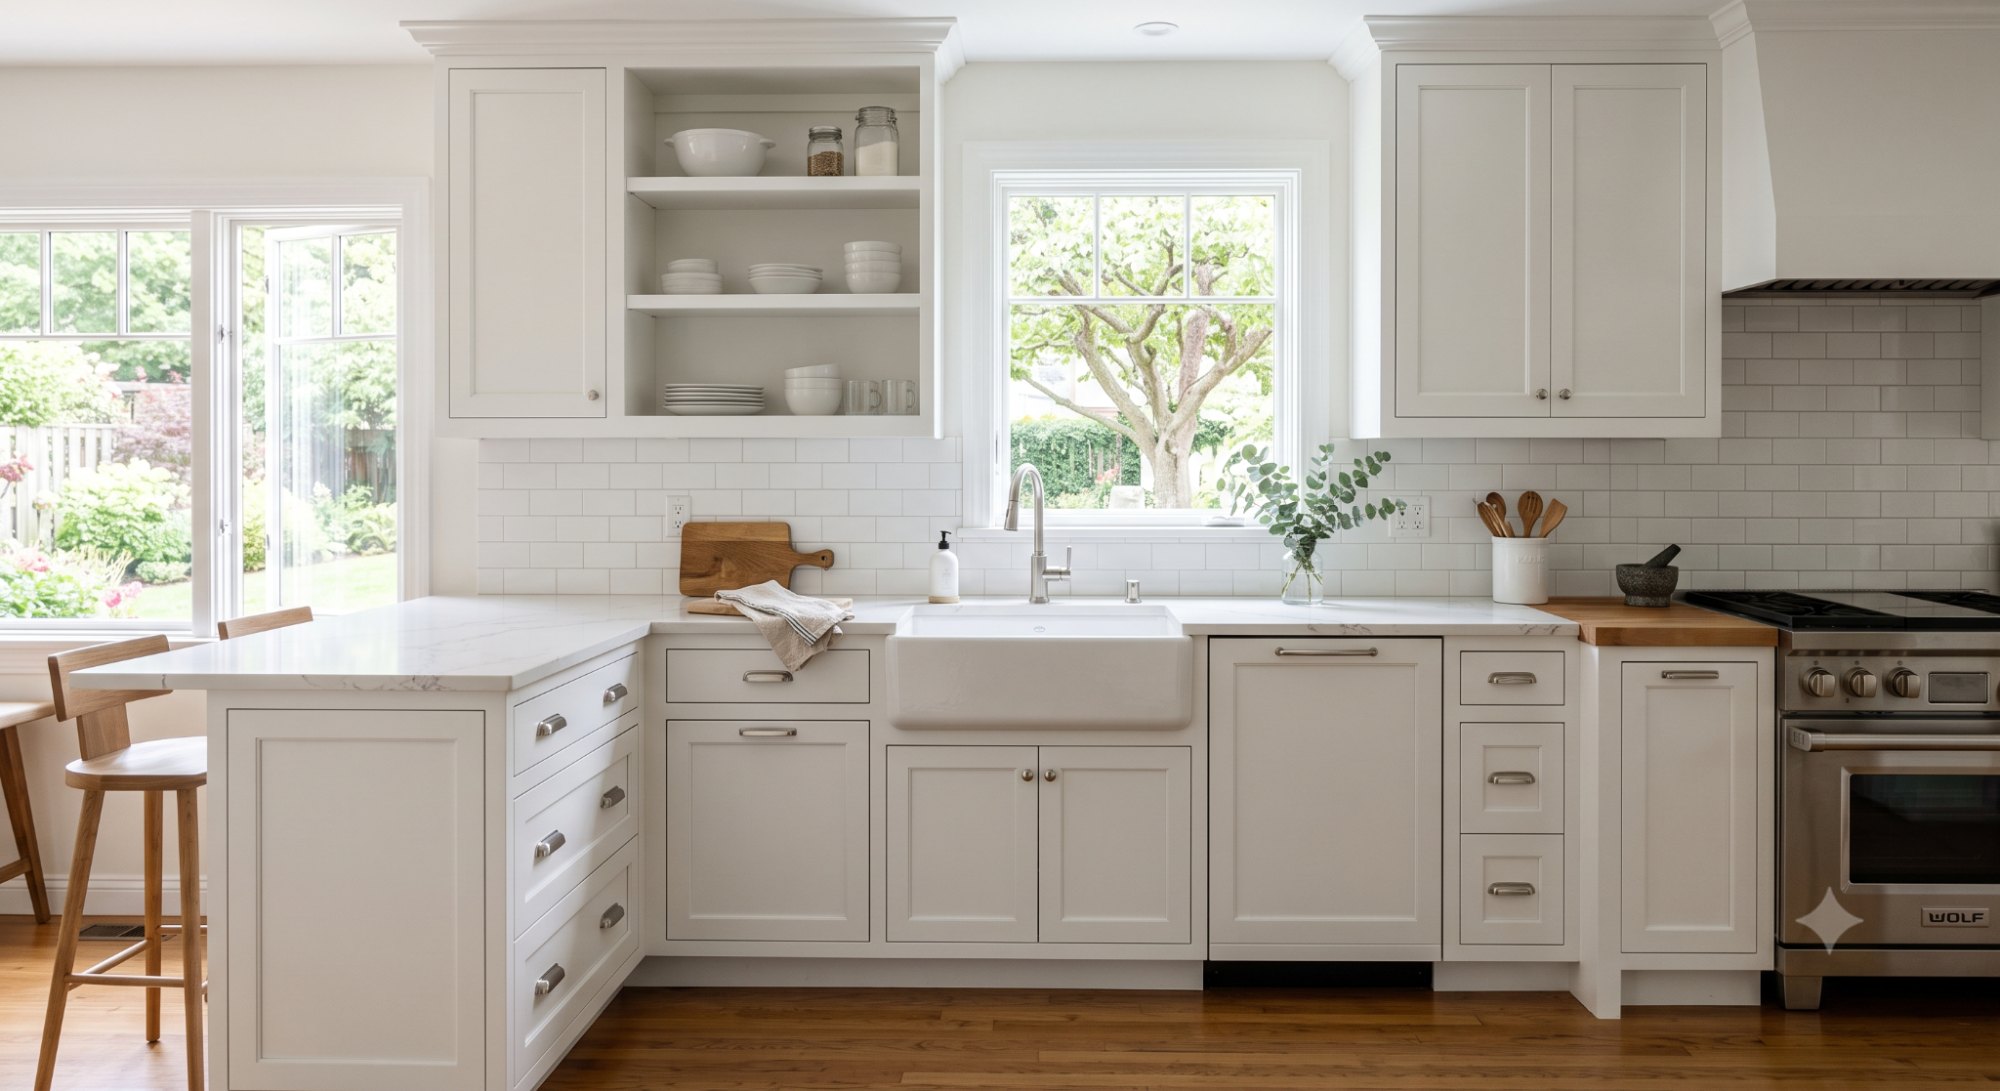
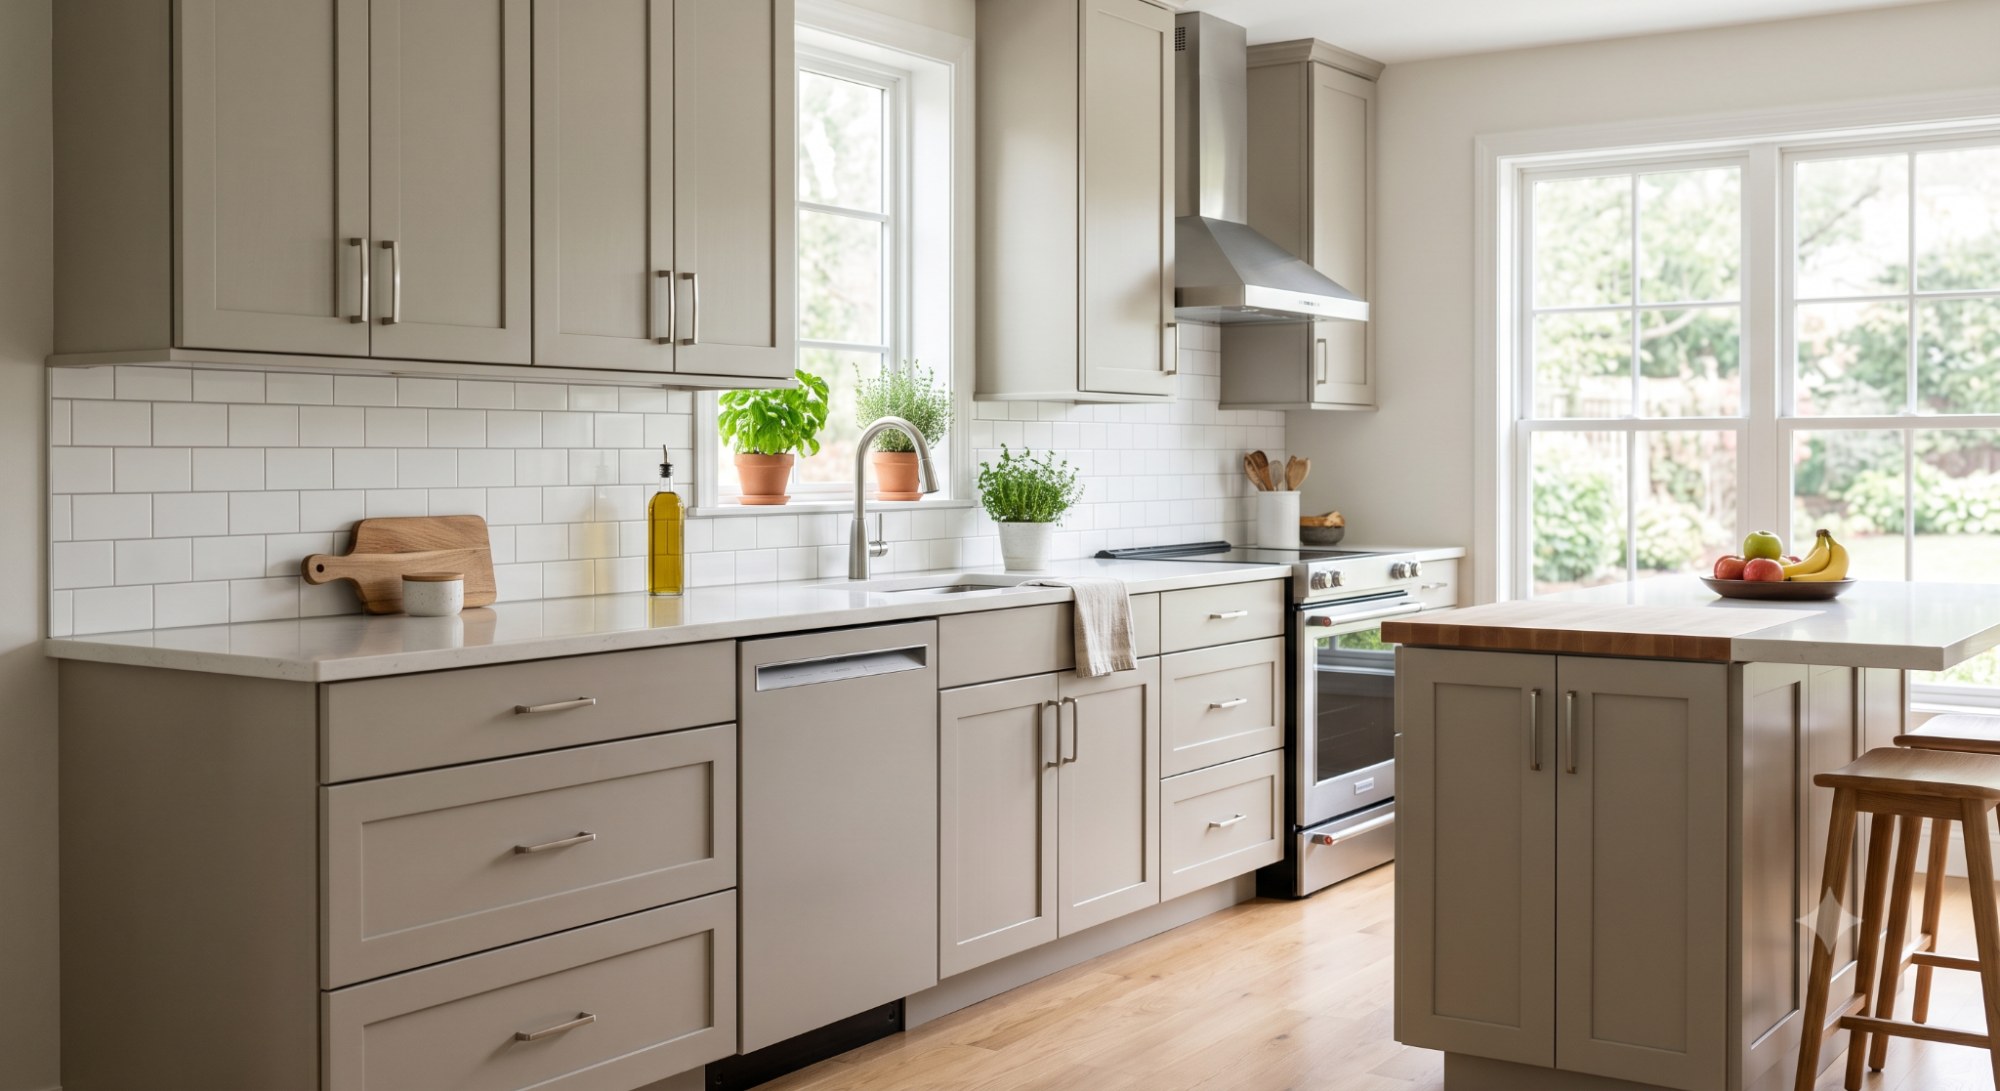
White cabinets brighten a kitchen and make small spaces feel larger. They work well in kitchens with limited natural light since white reflects what light is available. The main downside is that white shows dirt, grease, and fingerprints more easily than darker colors, so it needs more frequent cleaning.
Best kitchen style: Farmhouse, coastal, and traditional kitchens. Best countertop pairing: White marble, butcher block, or light quartz. Best hardware finish: Brushed nickel or matte black for contrast. Timeless or trendy: Fully timeless — white has never fallen out of favor. Lighting note: Choose a warmer white under yellow-toned lighting to avoid a stark, clinical look.
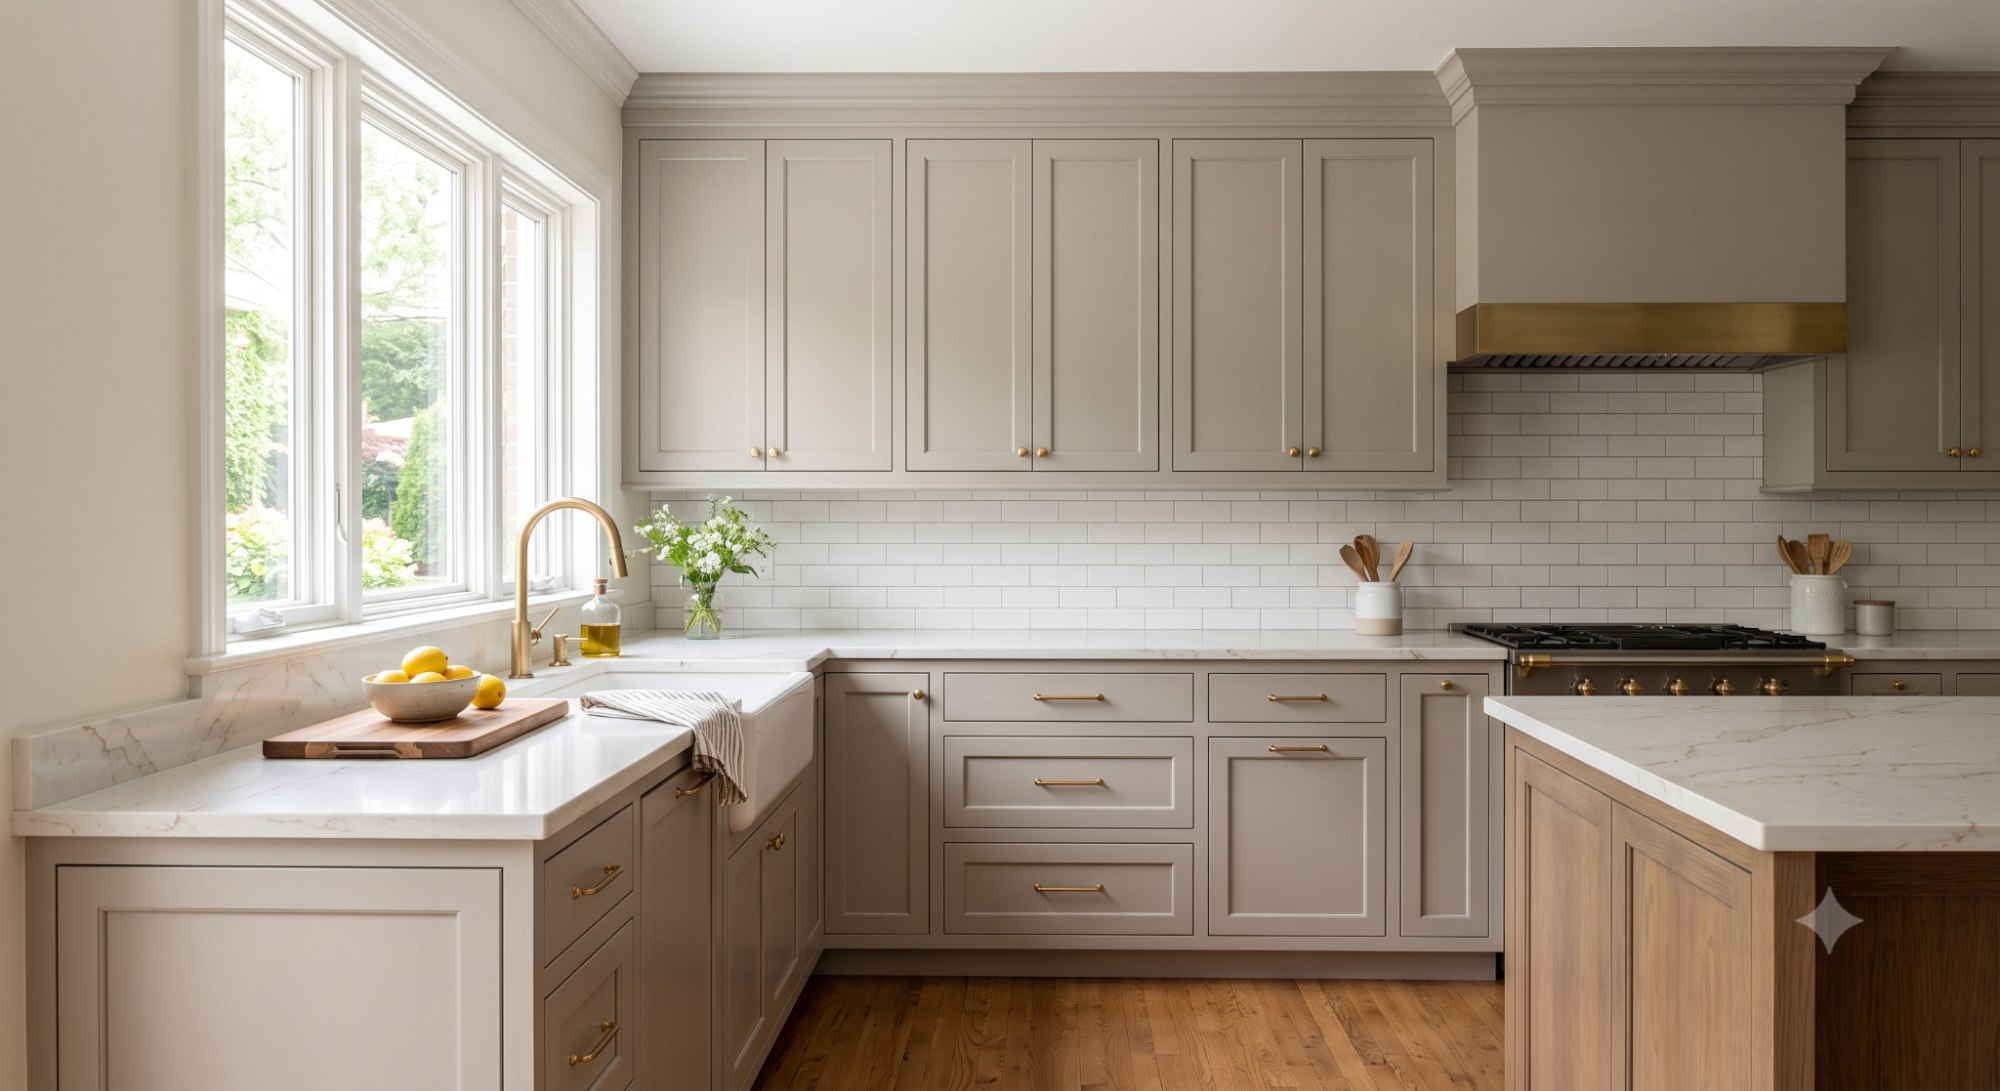
Greige — a blend of gray and beige — has stayed popular because it feels warmer than pure gray but more modern than beige alone. It pairs well with both warm and cool-toned countertops, which makes it a flexible, low-risk choice.
Best kitchen style: Transitional and modern-traditional kitchens. Best countertop pairing: Warm white quartz or light wood tones. Best hardware finish: Brushed gold or warm brass. Timeless or trendy: Timeless — greige has proven to age well over the past decade. Lighting note: Holds its warm-neutral balance well in both natural and artificial light.
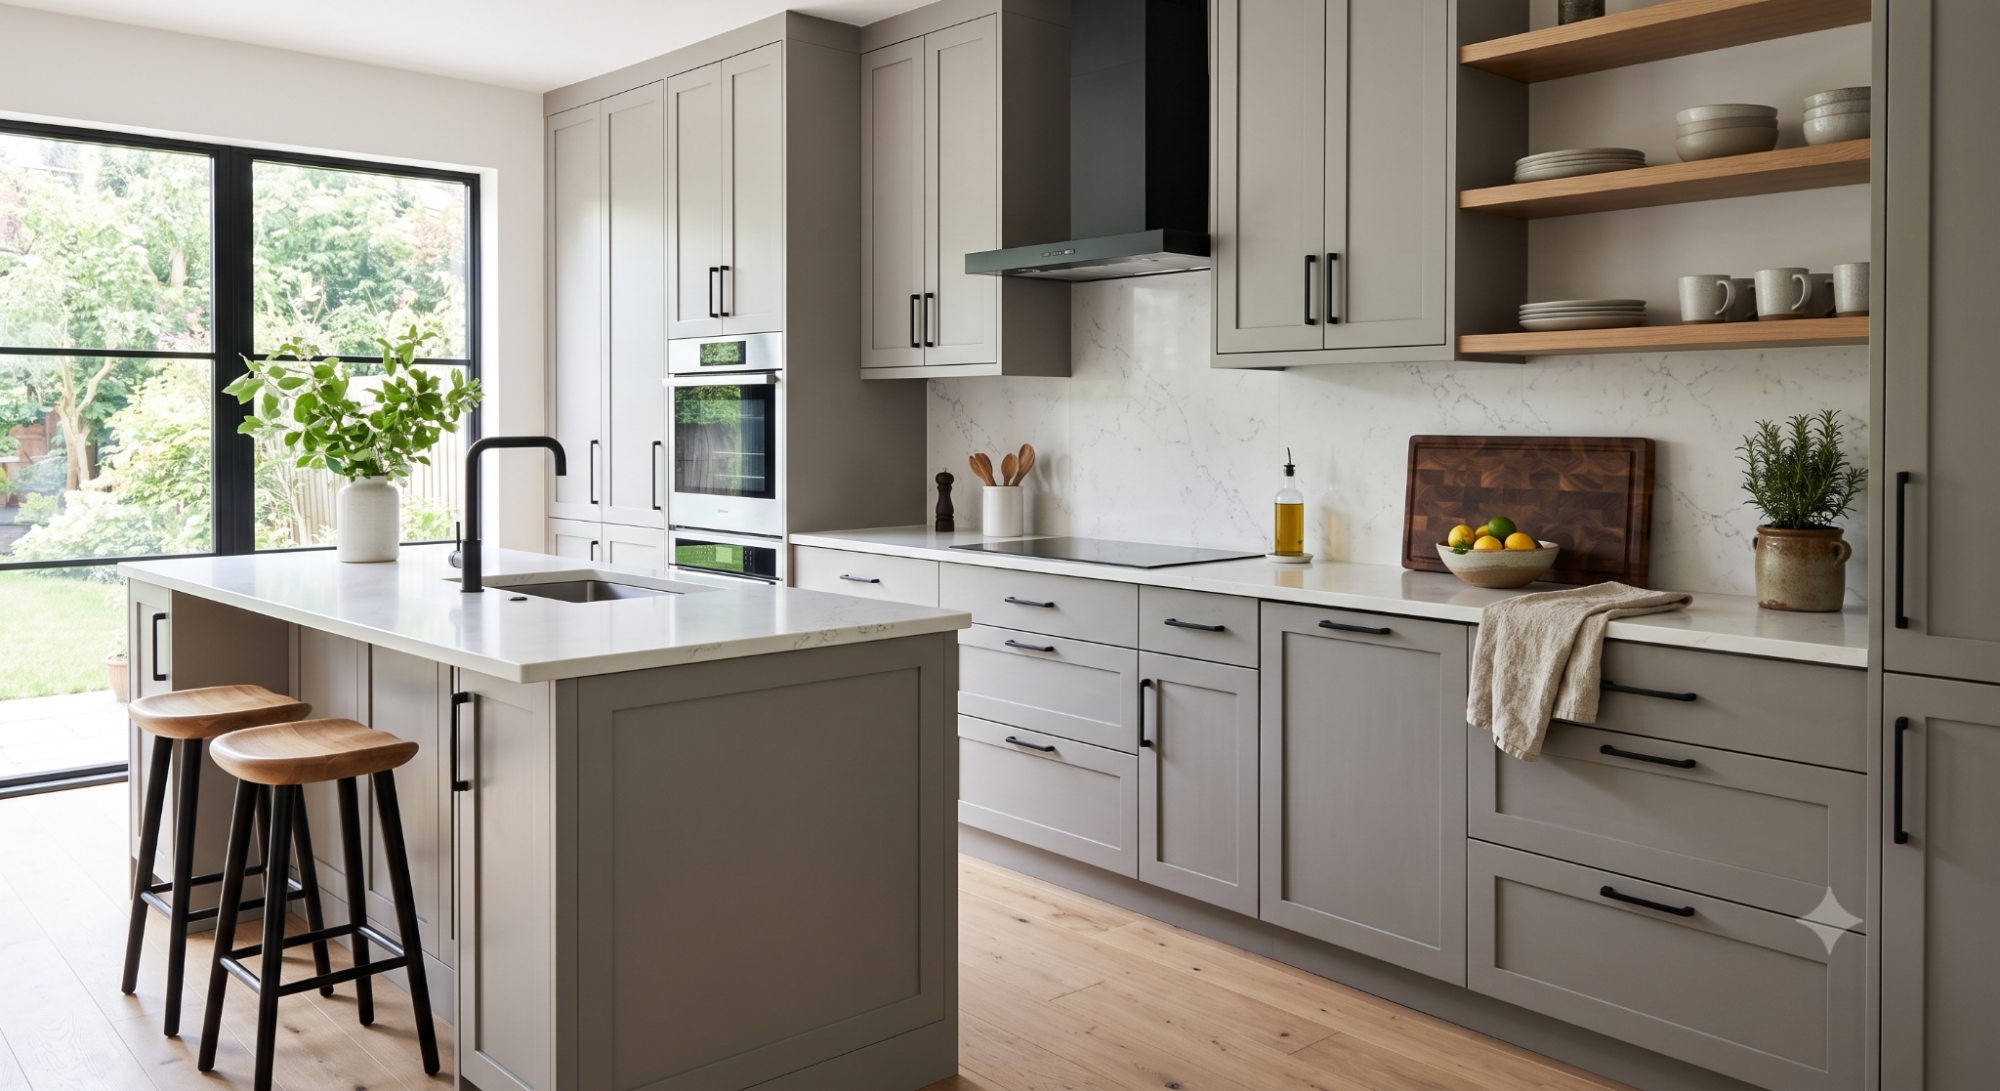
Soft gray gives a kitchen a clean, contemporary look without feeling cold or sterile. It works especially well in kitchens with plenty of natural light, since gray can look slightly flat in dim rooms. It pairs nicely with both stainless steel and warm wood accents.
Best kitchen style: Modern and minimalist kitchens. Best countertop pairing: White or gray-veined quartz. Best hardware finish: Brushed stainless or matte black. Timeless or trendy: Timeless, though very cool-toned grays can feel dated faster than warmer grays. Lighting note: Test in natural daylight — gray can look muddy under warm incandescent bulbs.
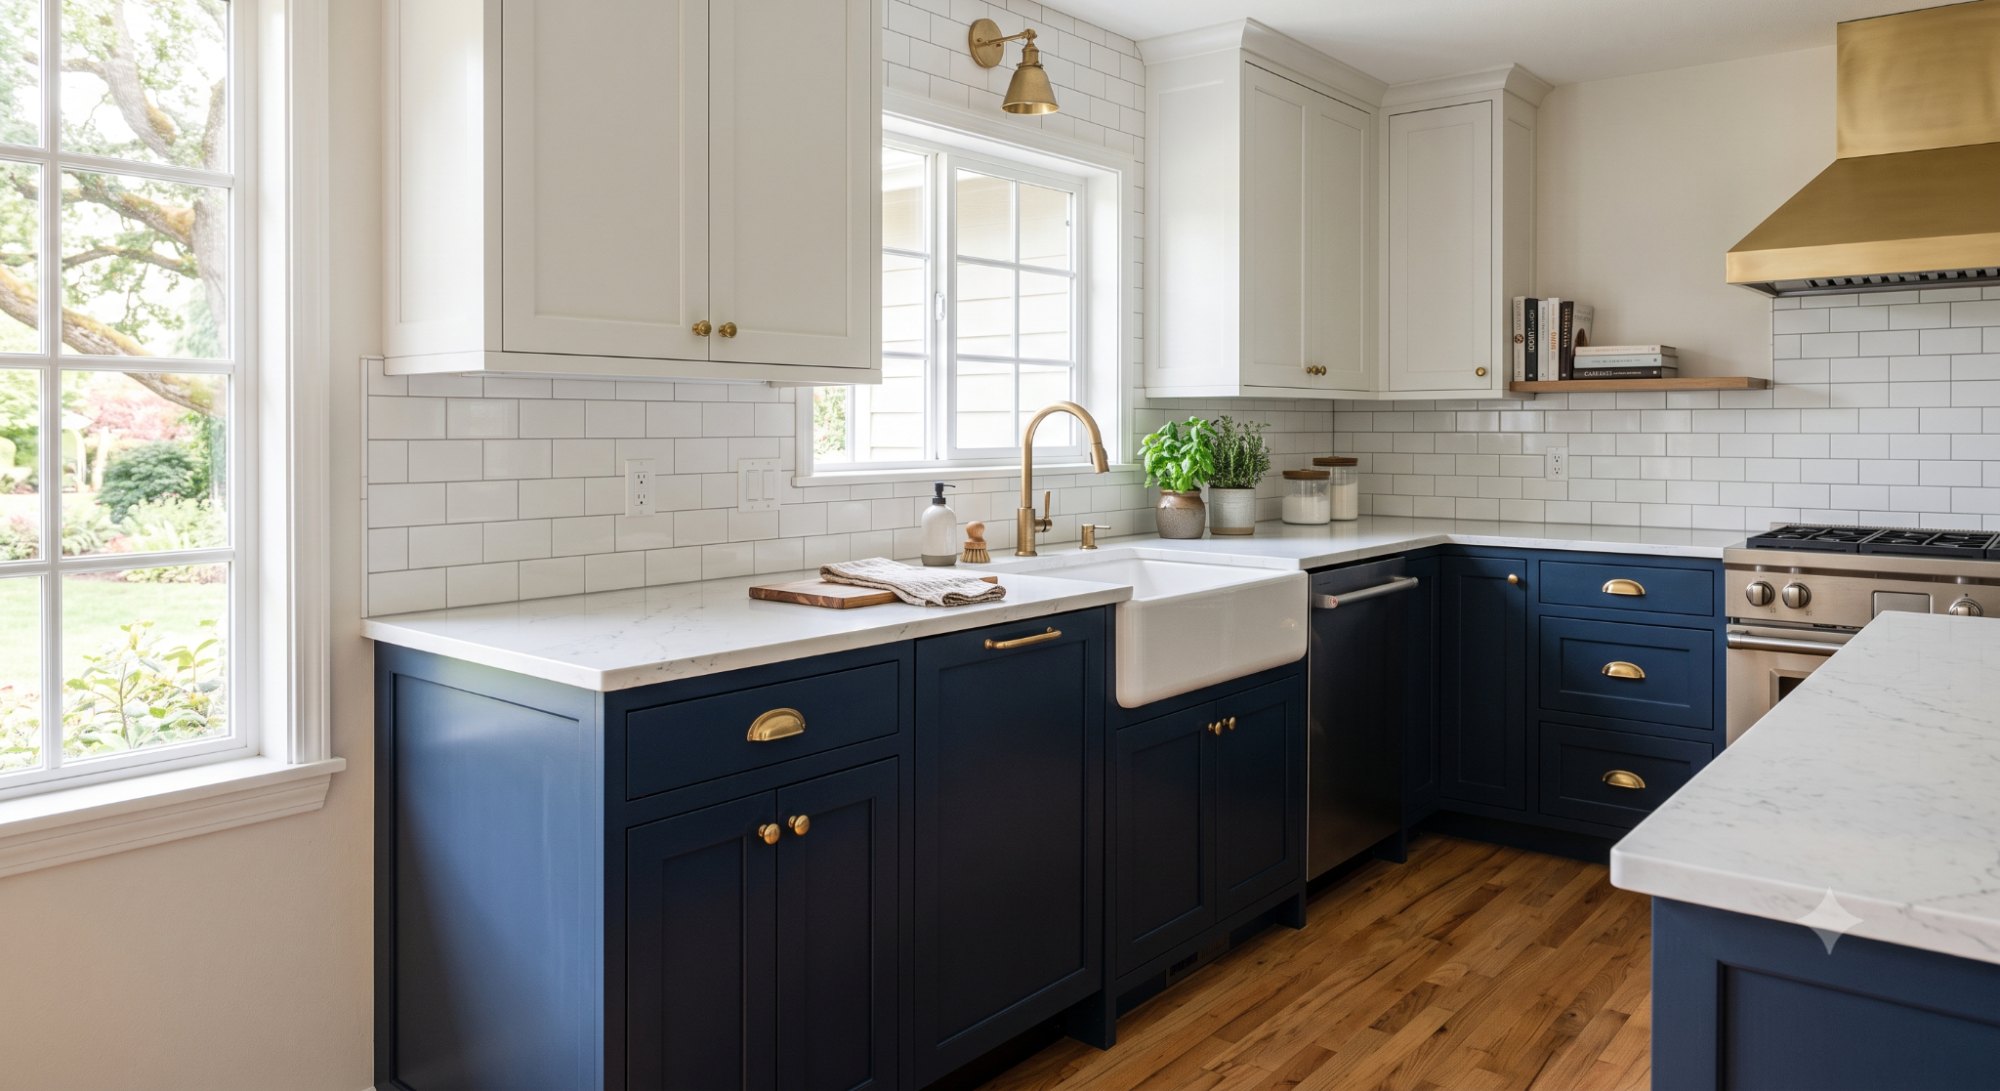
Navy blue has moved from "trendy" to "timeless" over the past several years. It adds contrast and depth, especially on lower cabinets paired with a lighter upper cabinet or wall color. Navy works particularly well in kitchens with brass or gold hardware.
Best kitchen style: Traditional, coastal, and modern-classic kitchens. Best countertop pairing: White or light gray quartz for contrast. Best hardware finish: Brass or gold. Timeless or trendy: Now considered timeless, though very dark navy can feel heavy in small kitchens. Lighting note: Looks richest under warm lighting; can appear almost black in dim rooms.
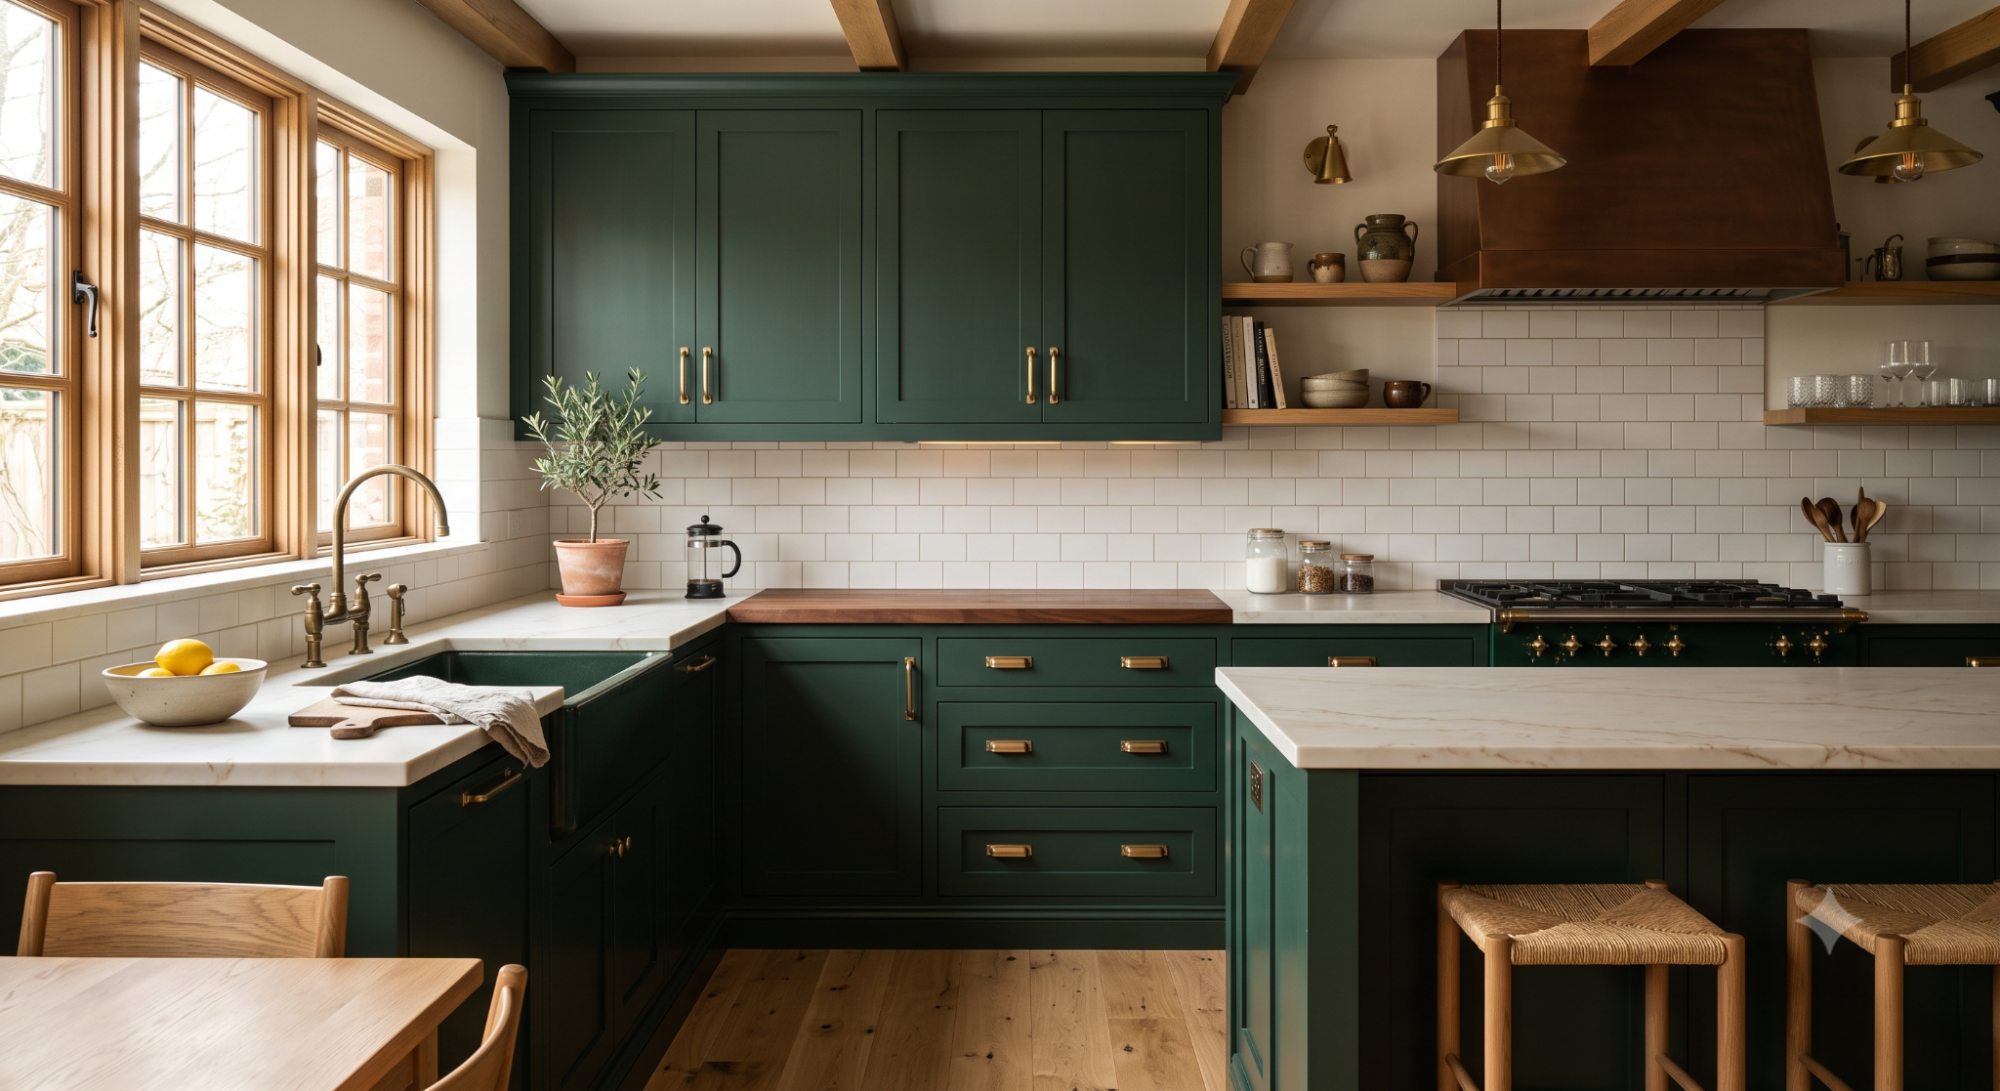
Dark green, especially deeper forest and hunter shades, brings warmth and a natural feel to a kitchen. It works well in kitchens with wood floors or natural stone countertops. Because it's a bolder choice, it's worth testing a sample on your actual cabinets before committing to the whole kitchen.
Best kitchen style: Traditional, farmhouse, and moody-modern kitchens. Best countertop pairing: Butcher block, warm quartz, or natural stone. Best hardware finish: Brushed brass or bronze. Timeless or trendy: Leaning timeless, but trending upward in popularity, so it reads as more current than navy or white right now. Lighting note: Deep greens can look almost black under low light, so check the color in your kitchen's darkest hour before committing.
When choosing between these, remember that lighting changes everything. A color that looks perfect in a bright showroom can look completely different under your kitchen's actual lighting, whether that's warm incandescent bulbs, cool LED strips, or lots of natural daylight. Always test a sample directly on your cabinets, and look at it in both daytime and evening light before deciding.
Good painting kitchen cabinets results come down to preparation more than the paint itself. Even the best cabinet paint will fail if the surface underneath isn't ready for it.
Here's a basic checklist to gather before you start:
This is the step people rush the most — and it's the one that determines whether your paint job lasts two months or ten years.
Cleaning comes first. Kitchen cabinets build up a layer of grease and grime you can't always see, especially near the stove. Wipe every surface down with a degreasing cleaner before doing anything else.
Deglossing removes the factory sheen on cabinets so new paint has something to grip onto. A liquid deglosser works well if you want to skip heavy sanding.
Sanding with a sanding sponge scuffs the surface further and smooths out any old imperfections. You don't need to sand down to bare wood — just enough to knock off the shine and feel a slight texture.
Priming is the step people skip most often, and it's a mistake. A bonding primer helps paint stick to slick surfaces like laminate or old paint, and it blocks stains and wood tannins from bleeding through your new color, especially on oak or knotty wood.
Can You Skip Primer? Primer is absolutely necessary on laminate, previously glossy-finished cabinets, and raw oak or other tannin-heavy woods — skipping it on these surfaces is the single biggest reason paint peels within months. It can sometimes be skipped only if you're using a paint-and-primer-in-one product on a cabinet that's already lightly painted and in good condition. MDF and laminate should always be primed, no exceptions, since both resist paint adhesion on their own.
Pro Tip: If you're painting over a dark or stained cabinet with a light color, ask your paint store to tint the primer toward your final paint color. It reduces the number of topcoats you'll need for full, even coverage.
Pro Tip: Remove cabinet doors and drawer fronts entirely and paint them flat on a table or sawhorses. It's slower than painting in place, but it prevents drips and gives you a much smoother, more even coat.
Pro Tip: Label doors and drawer fronts with painter's tape and a marker before removing them so you know exactly where each one goes back.
Once your cabinets are cleaned, degreased, sanded, and primed, you're ready to paint.
Brushes are best for cutting in corners, edges, and detailed areas like raised panel doors. A good angled brush gives you more control in tight spots.
Foam rollers work well for flat surfaces like drawer fronts and cabinet boxes. They leave a smoother finish than a standard paint roller and reduce visible texture.
HVLP paint sprayers give you the smoothest, most professional-looking finish, especially on doors with detail or raised panels. They take more setup time and practice, but many DIYers rent one specifically for cabinet projects.
A good general order is: prime, let dry, sand lightly with fine-grit paper, wipe away dust, then apply your first coat of paint. Let that coat dry fully — usually a few hours, depending on the paint — before adding a second coat.
Pro Tip: Two thin coats almost always outperform one thick coat. Thick coats trap solvent underneath the surface, which slows curing and makes the paint more likely to stay soft or develop drips.
Two coats is standard for solid, even coverage. After the final coat, cabinets are typically dry to the touch within a day, but full curing (when the paint reaches its maximum hardness) can take anywhere from a few days to a full month depending on the paint type. Handle cabinets gently during this curing window, even if they feel dry.
Pro Tip: Wait for full curing — not just dry-to-touch — before reinstalling hinges, handles, and hardware. Hardware installed too early can leave permanent dents or marks in paint that hasn't fully hardened yet.
These two terms get mixed up constantly, but they mean very different things for how soon you can use your cabinets.
| Stage | What It Means | Typical Timeframe |
| Dry to touch | Surface no longer feels wet | A few hours |
| Ready for second coat | Firm enough to layer more paint | 2–24 hours, depending on paint |
| Safe for light use | Can close doors gently without marking | 1–3 days |
| Fully cured | Maximum hardness reached; safe for hardware and normal use | 1–4 weeks, depending on paint type |
The key takeaway: just because cabinets feel dry doesn't mean they're cured. Rushing this last stage is one of the most common reasons paint gets dented, scuffed, or marked shortly after a repaint.
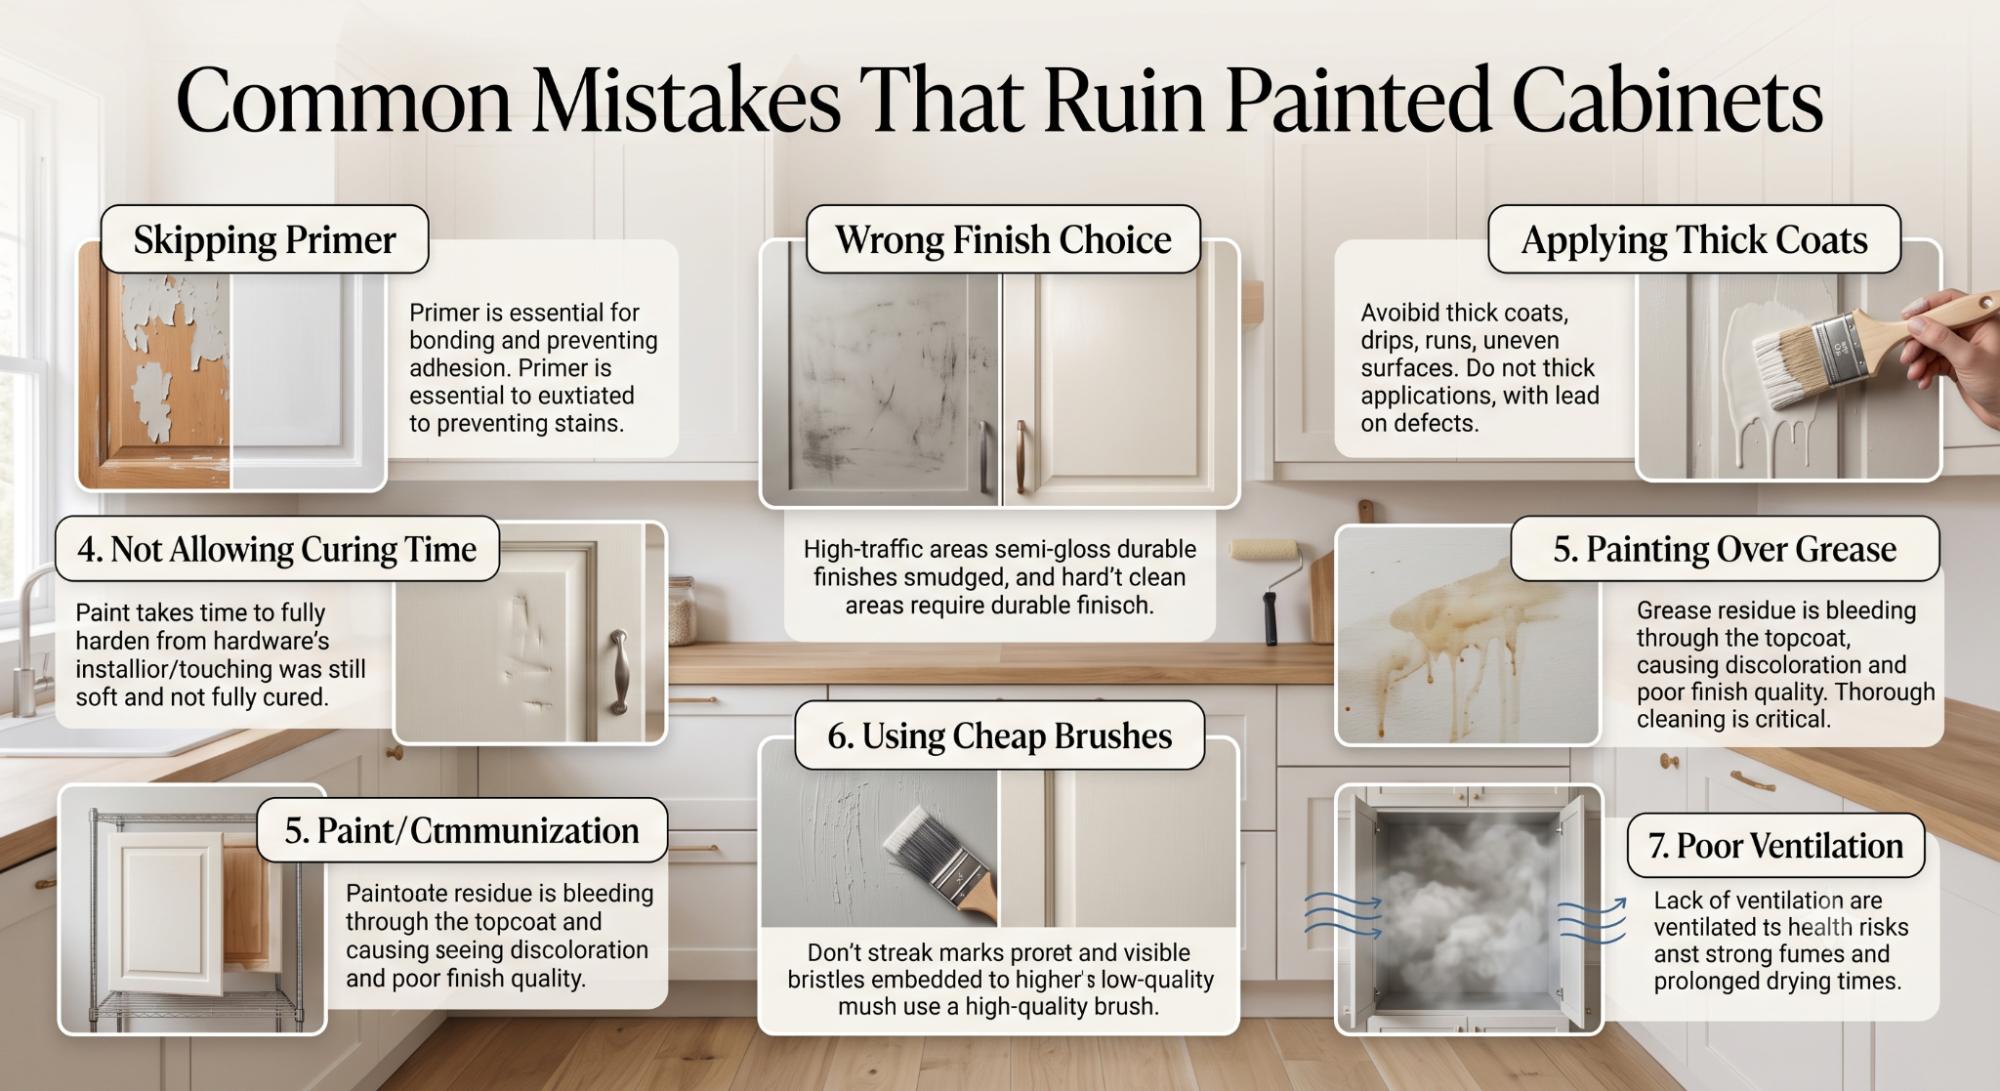
Most cabinet paint failures trace back to one of these mistakes. Here's what to watch for and how to avoid each one.
Skipping primer. This is the most common mistake by far. Without primer, paint has a much harder time bonding to slick or previously finished surfaces, which leads to peeling within weeks or months.
Wrong finish choice. Choosing a matte or flat finish because it "looks nice" often backfires, since these finishes are harder to clean and show grease marks more easily over time.
Applying thick coats. It's tempting to load up the brush or roller to cover faster, but thick coats dry unevenly, take longer to cure, and are more likely to develop drips or an uneven texture.
Not allowing curing time. Touch-dry and fully cured are two different things. Rehanging doors or loading up drawers too soon — even if the paint feels dry — can leave permanent marks or cause the paint to stay soft longer than it should.
Painting over grease. Kitchen grease is often invisible until paint won't stick to it. A quick wipe-down isn't always enough — use a real degreasing cleaner before you start.
Using cheap brushes. Inexpensive brushes shed bristles and leave more visible brush marks. Investing in one or two quality angled brushes makes a noticeable difference in the final look.
Poor ventilation. Beyond the fume concerns, poor airflow slows down drying time and can trap dust or debris in wet paint, leaving a rough texture.
A properly painted cabinet, using a quality product and correct preparation, typically lasts somewhere between 5 and 15 years before it needs a refresh. That's a wide range, and several factors determine where your cabinets will fall within it.
Cleaning habits play a big role. Harsh scrubbing or abrasive cleaners wear down the finish faster than gentle wiping with mild soap and water.
Moisture exposure near sinks and dishwashers can shorten a paint job's lifespan if water is allowed to sit and seep into edges or seams.
UV exposure from direct sunlight can cause certain paints, especially oil-based and some acrylics, to yellow or fade over time.
High-traffic kitchens — especially ones with kids or frequent cooking — put more daily stress on cabinet paint through constant opening, closing, and hand contact, which naturally shortens the time before touch-ups are needed.
A little regular care goes a long way toward stretching the life of your painted cabinets.
For most homeowners, yes — painting is one of the most cost-effective ways to transform a kitchen without a full renovation. But it's worth comparing your options before deciding.
| Painting | Refacing | Replacing | |
| Cost | Lowest | Moderate | Highest |
| Time | Days to a week | About a week | Several weeks |
| Lifespan | 5–15 years | 10–20 years | 20+ years |
| Value | Good return for the cost | Solid mid-range option | Best if cabinets are structurally damaged |
Painting makes the most sense when your cabinet boxes and doors are still structurally sound but the look feels dated. Refacing is worth considering if you want new door styles without replacing the boxes. Replacing only really makes sense if your cabinets have water damage, warping, or other structural problems that paint can't fix.
If you take nothing else from this guide, take this: for most people, Benjamin Moore Advance in a satin or semi-gloss finish is the safest, most balanced choice. It suits nearly every cabinet material, applies well by brush or sprayer, and holds up for years once it's had time to cure.
If your priorities shift, the right choice shifts too. Choose Sherwin-Williams Emerald Urethane if long-term chip resistance matters more to you than upfront cost, especially in a busy family kitchen. Choose Behr Alkyd Enamel if you want strong performance without the premium price tag. And lean toward satin over semi-gloss if you want a slightly softer look, or semi-gloss if easy cleaning is your top priority.
Whatever you choose, remember that preparation has a greater impact on how long your cabinets last than which paint you buy. A budget paint applied over a properly cleaned, deglossed, sanded, and primed surface will consistently outperform a premium paint slapped over grease and old glossy finish. Spend your effort on the prep work first — the paint can only do its job once the surface underneath is ready for it.
Most cabinet paints can be tinted to a wide range of colors at the paint store, similar to wall paint. However, very dark colors made from a light paint base sometimes require an extra coat for full, even coverage, so ask your paint store about the best base to use for your chosen shade.
Yes, and it often performs even better there. Bathroom cabinets face less grease exposure than kitchen cabinets, so the same durable, moisture-resistant paint tends to last just as long or longer in that setting. It also works well on furniture pieces like dressers or built-in shelving that need a hard, washable finish.
This usually means the paint hasn't fully cured yet, even if it feels dry to the touch. Some alkyd and hybrid enamels can feel slightly tacky for days or weeks during the curing process, especially in humid conditions or cooler room temperatures. Giving it more time, and improving airflow in the room, usually resolves it.
In most cases, yes. As long as the existing paint is in decent shape without heavy peeling, you can clean, deglossen, and lightly sand the surface, then apply a fresh coat. Stripping is really only necessary if the old paint is failing badly or if there are multiple thick layers built up over the years.
Yes, quite a bit. High humidity slows down drying and curing time significantly, while cold temperatures can prevent paint from curing properly at all. Most cabinet paints perform best when applied in a space kept between 65 and 85 degrees Fahrenheit with moderate humidity.
Daniel Hartman is a color specialist with years of experience helping people make confident and thoughtful design decisions. He provides practical and approachable guidance while balancing creativity and functionality in every project. Daniel enjoys visiting art and design exhibits to study how different environments influence aesthetics, mood, and perception, bringing a rich perspective and insight into his work. His approach makes design decisions both simple and enjoyable.


No Comments