


How to Choose the Perfect Window Coverings for Your Home
Window coverings are more than just decorative features. They influence


It might sound so scary knowing that you can transform a kitchen sink but it is not as difficult as you would anticipate. The most commonly asked question that most people often ask themselves when they are at home is whether or not they can install a new sink without necessarily summoning the plumber. Learning How to Change a Kitchen Sink is a good skill that would save you money and get a feeling of pride.
Any user can successfully undertake this project provided he has the right tools and patience. When you decide to replace your kitchen sink, then you are embarking on a nice home improvement project.
It is also important to know the process because you are correcting the errors in a quick and efficient manner. Installing procedures of sinks is not difficult with proper dissection. How to Change a Kitchen Sink becomes manageable with the right approach.
It is part of the good skills that one can learn when he is simply in need of a new appearance or your old piece of furniture is broken down.
The steps that are to be followed in installing a kitchen sink easily and safely will be given in the form of a step-by-step tutorial of the steps involved in the installation of this sink.
Not sure if you need a new sink? Here are the most common warning signs:
Cracks, chips, or rust – These don’t just look bad. They can harbor germs and get worse over time. Small chips can turn into big cracks that let water leak through.
Leaks that keep coming back – If you’ve fixed the same leak multiple times, the problem might be your sink itself, not just the pipes underneath.
Outdated design or wrong size – Maybe your sink is too small for your pots and pans. Or it just doesn’t match your kitchen’s style anymore.
Stains or wear that can’t be fixed – Some old sinks get stained or worn down so badly that no amount of scrubbing will make them look good again.
If any of these sound familiar, it’s probably time for an upgrade.
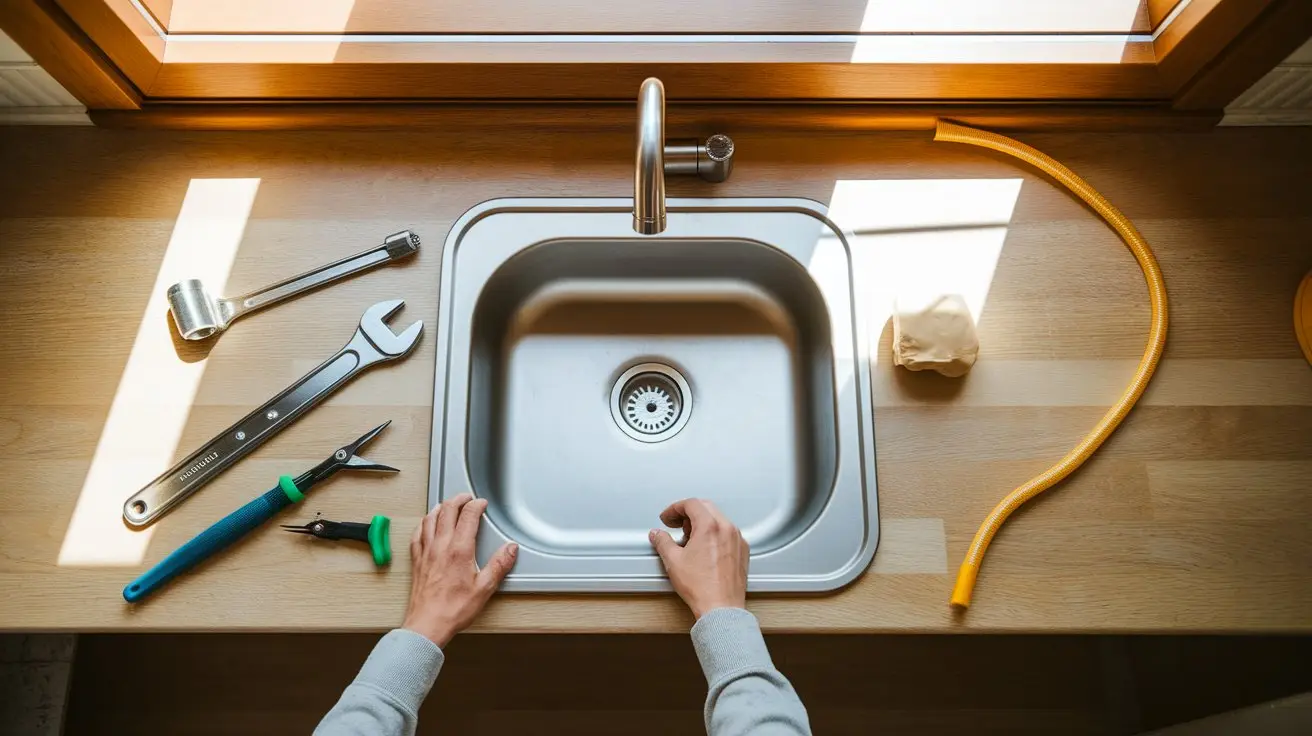
Before you start, gather everything you’ll need. This will save you trips to the store in the middle of your project.
Tools:
Materials:
Most of these items are available at any hardware store. If you’re not sure what size sink you need, measure your current one before shopping.
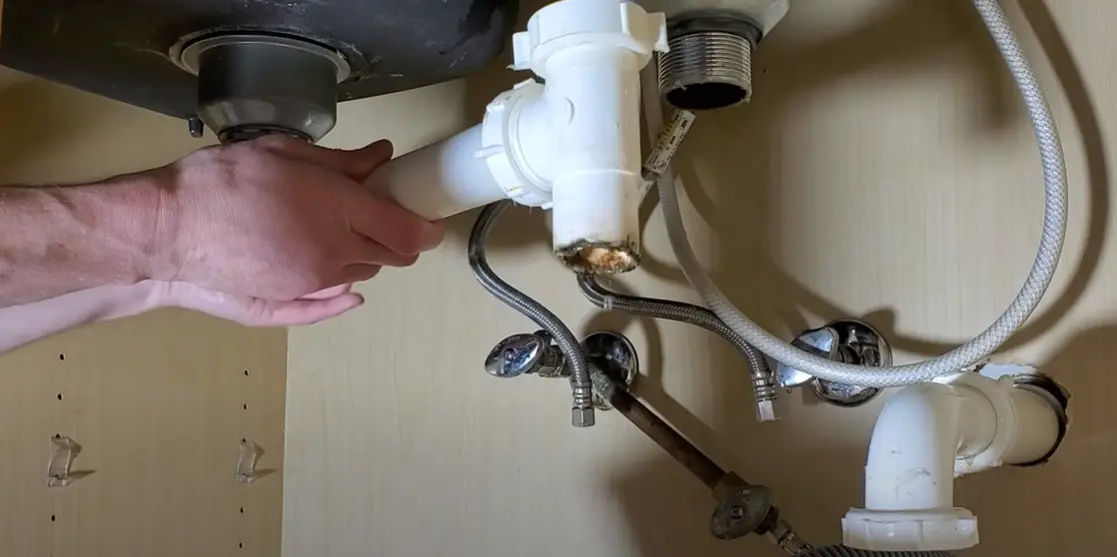
Begin by turning off the water supply under the sink, or use the main shut-off if needed. Open the faucet to release pressure. Place a towel or bucket under the pipes, then disconnect the P-trap, plumbing fittings, and water lines. Look for any clips or fasteners holding the sink to the countertop.
Cut along the seal around the sink with a utility knife and scrape away old glue. Use a flat pry bar to lift the sink carefully. Heavy cast iron sinks may need extra help or careful lifting. Once removed, clean the countertop, remove leftover silicone, and wipe it down with denatured alcohol.
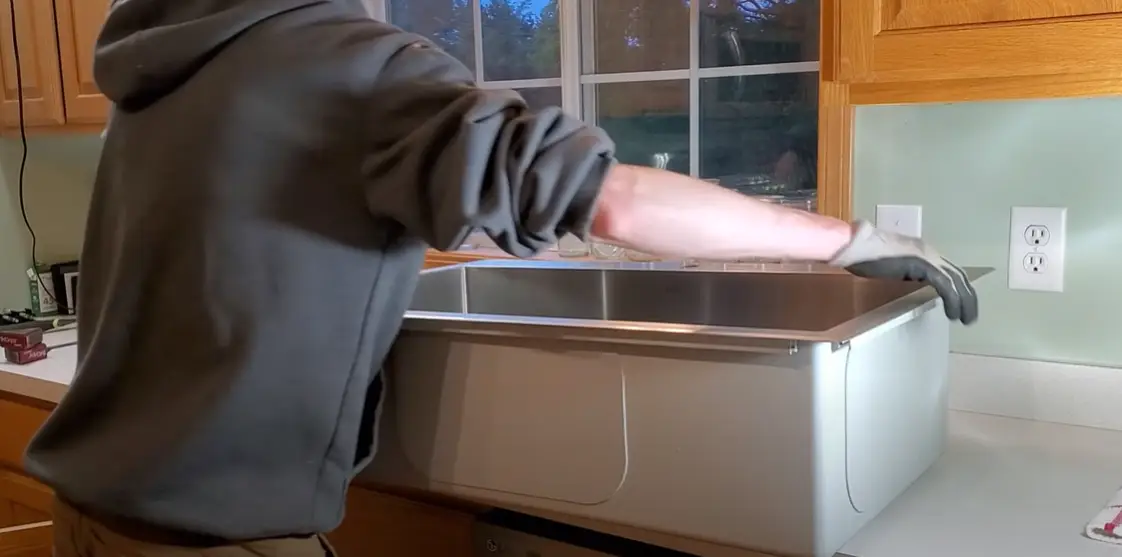
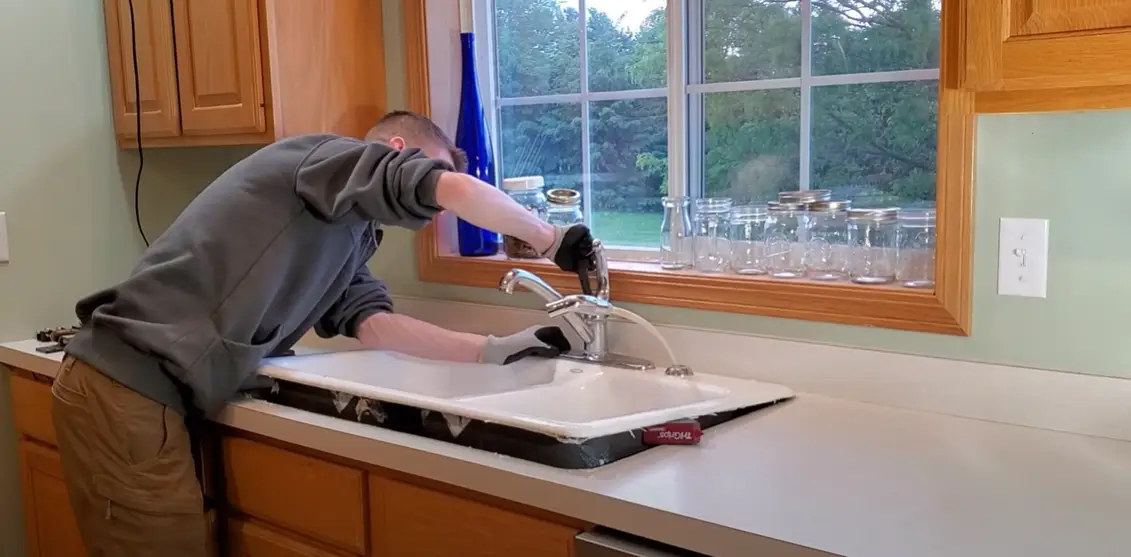
Dry-fit the new sink to check the size. Attach the mounting hardware loosely, then apply a bead of silicone around the edge. Lower the sink into place carefully and secure the clips, starting at the front. Wipe away any excess silicone before it hardens.
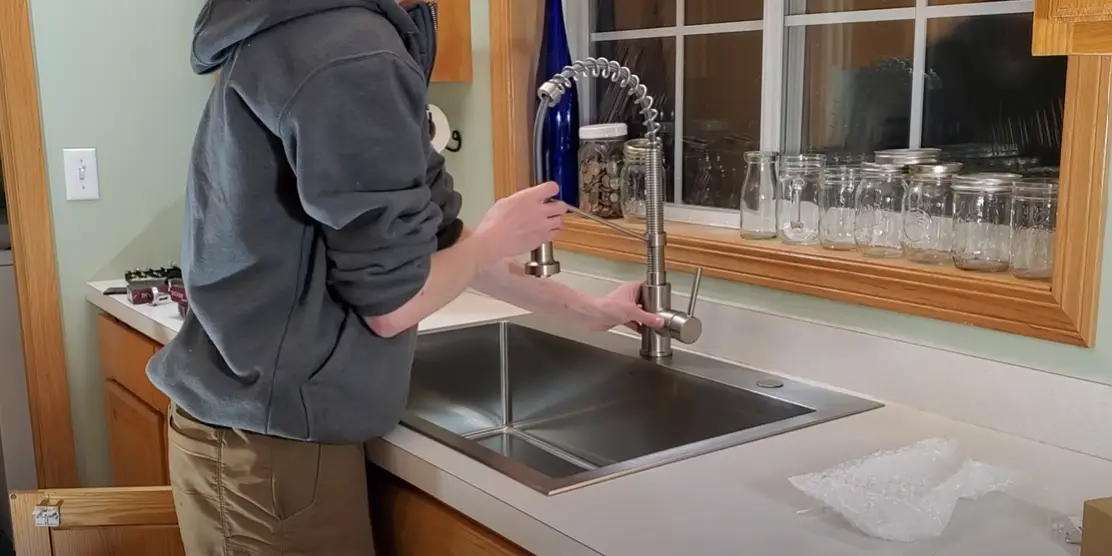
Fit the faucet into the sink opening and secure it from underneath. Align it, then connect the hot and cold water lines along with any sprayer hoses. Install the strainer assembly and gasket, then dry-fit the P-trap and dishwasher connection. Trim or cut pipes if needed before sealing them.
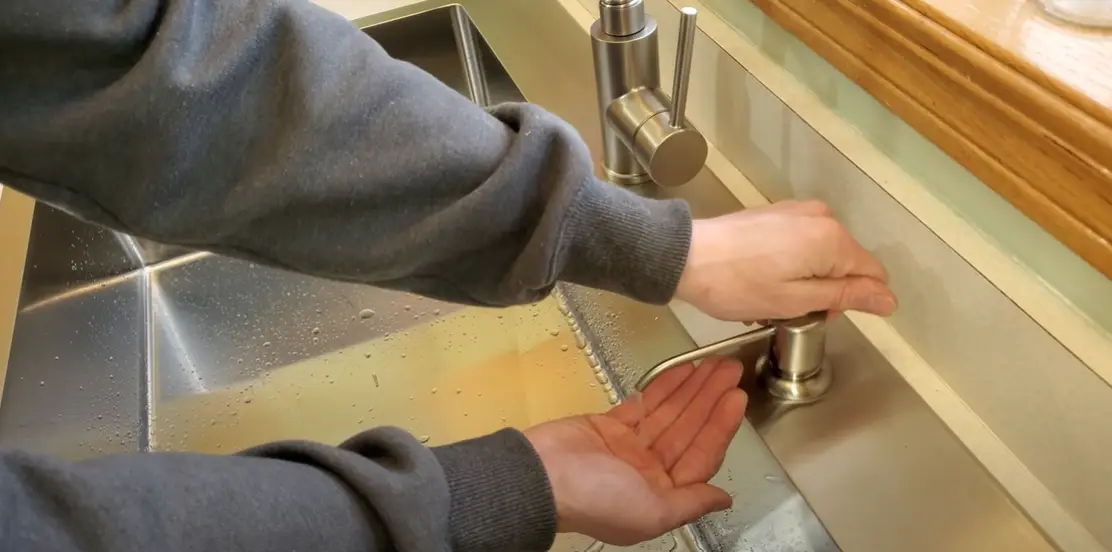
Connect the P-trap and fittings with PVC primer and cement where required. Reattach the dishwasher hose. Turn the water back on and run the faucet for 20 seconds to flush air and check for leaks. Tighten connections if necessary. Finish by installing extras like a soap dispenser.
Watch the full process step by step here:
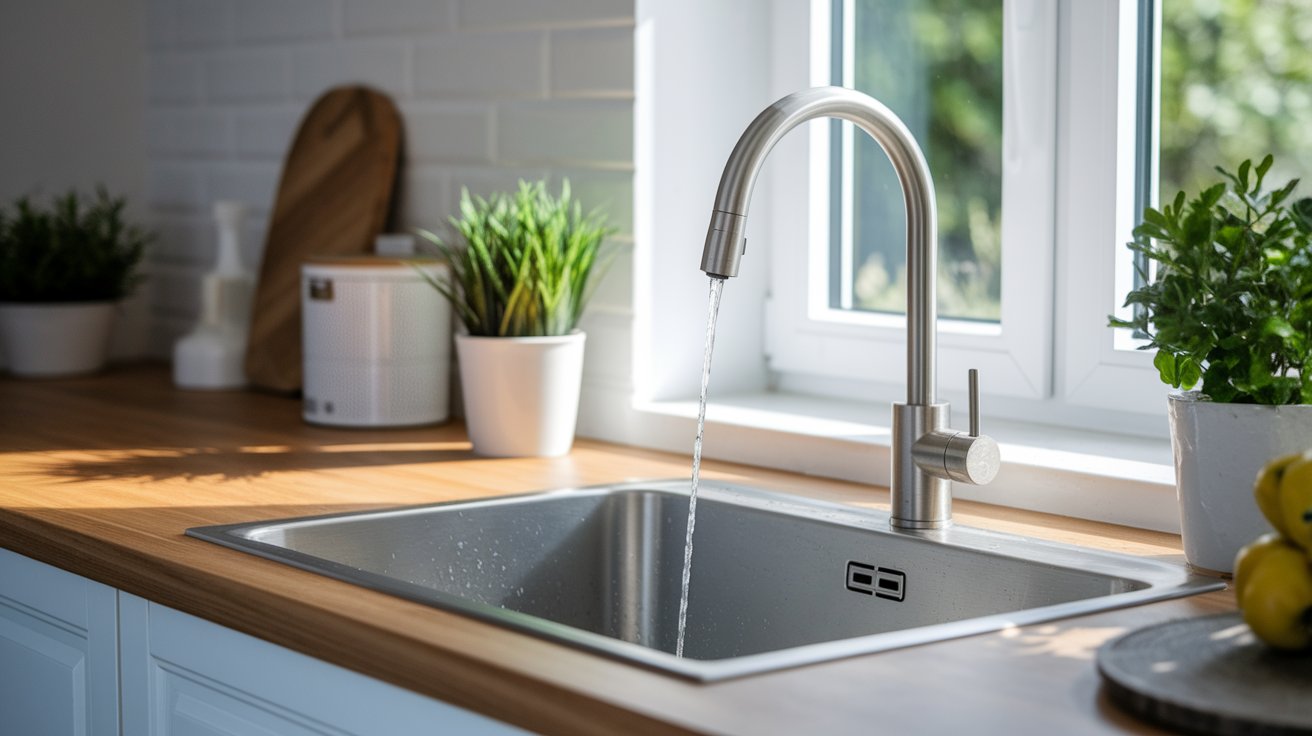
Turn your water supply valves back on slowly. Turn them counterclockwise until they’re fully open.
Turn on your faucet and let the water run. Check underneath for any leaks around the connections.
Look around the edges of your sink too. If you see water seeping out, you might need more sealant.
If you find leaks, turn off the water and tighten the loose connections. Small drips often stop on their own as the connections settle.
Wipe away any excess sealant with a damp cloth while it’s still wet.
Now that you have a beautiful new sink, keep it looking great with these simple tips:
Don’t pour grease down the drain – It hardens and clogs pipes. Let it cool and throw it in the trash instead.
Avoid harsh chemicals – They can damage your sink’s finish over time. Stick to mild dish soap for regular cleaning.
Use a sink mat – This protects the bottom from scratches when you’re washing pots and pans.
Clean regularly – A quick wipe-down after each use prevents stains and keeps your sink sparkling.
Don’t let water sit – Standing water can cause spots and stains, especially on stainless steel sinks.
Some jobs are better left to the experts. Call a plumber if:
The countertop needs cutting – If your new sink is a different size, you’ll need special tools and skills to modify the opening safely.
Plumbing changes are complicated – Moving pipes or adding new ones requires experience and might need permits.
Leaks won’t stop – If you’ve tightened everything and water still leaks, there might be a bigger problem that needs professional attention.
You’re not comfortable with any step – There’s no shame in calling for help. A small mistake can lead to expensive water damage.
And now you are informed of how to replace a kitchen sink! It requires time and patience to know how to change a kitchen sink. Learning how to replace a kitchen sink should not be in a hurry. With such steps, you will have a beautiful new sink.
Congratulations! You have learned – you have done it on your own! What you have taught me will assist on future projects. A lot of people are scared of changing a sink in a kitchen but you have shown that it is possible.
The next time someone would enquire how to change a kitchen sink, you will be able to share your experience. These are the tips to keep in mind regarding the process when the time to remodel your house comes.

Jackson Reed is a hands-on home projects expert with over eight years of experience helping people create practical, achievable solutions for their spaces. He enjoys discovering innovative approaches that empower readers to improve their environments themselves. Jackson combines creativity, problem-solving, and practicality in his work, inspiring others to transform everyday spaces in ways that are both realistic and impactful, while encouraging confidence and independence in tackling projects.


No Comments